123 Street Avenue, City Town, 99999

(123) 555-6789

email@address.com


You can set your address, phone number, email and site description in the settings tab.
Link to read me page with more information.

Home

Filtering by Tag: Entertaining

Dining with Fable

Linnea A.

IMG_3750.JPG

Although there are a ton of beautifully hand crafted plates on the market, hardly any of them are affordable - especially when you're supporting a small business. And once you grow out of your “Ikea-everything-phase”, it can be a little daunting figuring out where to go for your “adult” flatware and dinnerware without breaking the bank... they truly are your gateway to adulting! Enter: Fable.

IMG_1715.JPG

Founded because they, too, had trouble finding accessible flatware and dinnerware, Fable’s mission is to help create more meaningful moments at the dinner table - and bring the joy of shared meals to everyone while doing so. So when you make a purchase from Fable, they pay it forward by providing a meal to someone in need. How cool is that?!

IMG_1717.JPG

Based here in Vancouver, Fable launched earlier this year, and I was lucky enough to get my hands on their beautiful dinner and side plates.

Made of a strong porcelain, each piece is fired twice, featuring a flat surface and low rim edge for easy stacking (perfect for those with minimal storage space)! The plates are finished with a beautiful matte glaze, which makes them ideal for any occasion.

Available in speckled white or black, these plates are both microwave and dishwasher safe (hallelujah)! And if you’re in Vancouver, the shipping is free (or they can arrange for local pick up/drop off). It doesn’t get anymore convenient than that!

IMG_1716.JPG
IMG_3752.JPG
IMG_3751.JPG

If you love these plates as much as I do, I highly recommend giving them a shot. And lucky for you, I have a promo code for you to use! Use my link and code LINNEA10OFF for 10% off your entire order!

Now what are you waiting for... go get your new dinnerware!

xo

Linnea

Homemade Hot Mocha

Linnea A.

IMG_6823.JPG

Homemade hot chocolate has always been a favourite treat of mine that both my dad and grandma are famous for making, and I love it especially during the holidays. But you know what makes it even better? Having it in the morning with a beautiful shot of caffeine mixed in. So. Damn. Good. Here’s my vegan twist on their old fashioned hot chocolate!

Ingredients

  • 1 tsp coconut palm sugar (or sugar of your choice)

  • 1.5 tsp cocoa

  • 1 nespresso pod (small shot) 

  • Almond milk, frothed

IMG_6822.JPG
IMG_6826.JPG

Directions

IMG_6824.JPG

1. Mix the sugar and cocoa together. Add a splash of almond milk, and form a paste with the mixture.

2. Once throroughly mixed, add your espresso shot to the paste, and stir until completely dissolved. In the meantime, froth your almond milk!

3. Top your chocolatey-espresso mixture with your frothed milk, garnish with your favourite marshmallows, and you’re set! Feels like a warm hug from Grandma, doesn’t it?!

xo

Linnea

How to Set a Christmas Table

Linnea A.

IMG_6671.JPG

As my very first Christmas Eve that I’ll be hosting in this apartment, I wanted to make sure my Christmas tablescape was extra special, to ensure everyone has a good time, and they ENJOY Christmas as much as possible. Ironically, I used to hate when my mom asked me to “set the table” for dinner, but I LOVE the sh*t out of table setting now! It’s also important to note that I don’t have a dining table - or a dining area, to be honest. So how did I pull off this Christmas tablescape? Well, I improvised, that’s how! I kept my theme very simple - earthy, Scandinavian decor, with a few touches of rustic, cabin vibes to keep it warm and cozy. And I’m not one to spend big bucks on things I’m only going to use a few times a year, but I’m here to tell you that if you follow these simple tips, you’ll have a perfectly laid out table setting in no time (even if you don’t actually have a real “dining” area).

IMG_6676.JPG

1. Folding furniture is your best friend

Yes, I said it! Folding. Furniture. Welcome to the world of condo living at its finest. I use folding furniture for ALL of my dinner parties. I have a big folding table that I keep in my storage locker, and I have 4 folding chairs from Ikea that I keep in my storage box on my patio. Once I put the table cloth over the table, and some faux fur or blankets over the chairs, you’d never even know it’s plastic underneath. If I have extra guests, I add the extra stools and seats I have around my home year-round!

IMG_6649.JPG
IMG_6670.JPG

2. Layer, layer, layer

A well laid table has tons of depth and different textures going on at once. I always make sure to set the table with either a round placemat or a charger, to act as the foundation for everyone’s place setting. Chargers can set the tone and mood of your tablescape, and make your dinnerware look completely different! I also layered some fresh rosemary wreaths for a pop of colour and a fresh holiday touch to the overall look.

IMG_6660.JPG
IMG_6651.JPG
IMG_6669.JPG

3. Mix and match

Let’s be real - unless you’re Jillian Harris (who I used to work for - miss you mucho Jilly!) or a prop stylist, no one has matching dinnerware, glassware or serveware for the exact amount of people you’re hosting - especially if it’s a large dinner. The beauty in setting a table is that it doesn’t have to match! Playing with different heights in glassware, and mixing flatware and dinnerware all adds to a unique table setting for each guest.

IMG_6673.JPG
IMG_6656.JPG

4. Add warmth with texture

Think linen tablecloths, wooden chargers, twine, pine cones, or anything with a cozy texture to add some warmth to set the scene. I didn’t add much colour, so I needed to add warmth with hints of wood, creams, greenery and twine.

IMG_6663.JPG
IMG_6653.JPG
IMG_6665.JPG

5. Light it up

It wouldn’t be a Scandinavian Christmas dinner without candlesticks! Growing up, my Farmor always had real candles lit all around her home, even though she has a crazy cat that likes to show off and dance around all the flames lol. So I’ve always been a big fan of candles, because they remind me of Sweden, and Christmas in general! You better believe I stacked my table with as many candles as possible. It also helps to have a cozy playlist going in the background that puts everyone at ease.

IMG_6678.JPG

And that’s pretty much it! You’re well on your way to hosting a Christmas dinner that your loved ones are SURE to enjoy! Happy holidays, all!

xo

Linnea

Cranberry Rosé Fizz Cocktails

Linnea A.

IMG_5851.JPG

Good morning, happy Tuesday! Coming at you with a festive cranberry rosé fizz cocktail! It’s the perfect bevvy to serve at your holiday parties,  with a “splash” of cran and just a dash of H2O in there to give you some extra hydration (because let’s face it, we all need more of that)! Let’s get to the recipe.

IMG_5850.JPG
IMG_5853.JPG

Ingredients

Yield: 2 servings

  • 2 tbsp cranberry sauce  

  • 8 oz. rosé

  • Sparkling water

  • Ice cubes

  • Frozen cranberries

  • Rosemary sprigs

IMG_5854.JPG

Directions

In a shaker, add the cranberry sauce, rosé and ice cubes, and give the mixture a vigorous shake.

Strain the mixture evenly between your glasses, and top each glass with sparkling water to give the cocktail a little fizz.

To chill the cocktail, garnish your drink with frozen cranberries, and some fresh rosemary for a festive touch.

IMG_5852.JPG

Hope you love this recipe as much as I do! Let me know if you try it; I’d love to see your creations. Happy holiday party-ing!

xo

Linnea

How to Create a Dessert Table

Linnea A.

IMG_5177.JPG

Over the past few weeks, I’ve been secretly planning my mama’s surprise 60th, which went off without a hitch, and she was absolutely floored! She loved it all, and had absolutely no idea. But the showstopper of the entire event definitely had to be the dessert table, which was my goal. HUGE thanks to my aunt for helping me set it up, and contributing so many delicious sweets along with my Grandma! Wondering how I created this bad boy?! Keep on reading, and I’ll share all my tips & deets!

SPATS-Recap2.jpg

1. Pick a colour scheme. What’s the celebrant’s favourite colour? Do they have any favourite flowers or greens? This will help determine the colours you’ll be using throughout your entire event. Pick this first, then you can figure out the balloons and other decor to correspond and compliment the floral/dessert colour way later.

FullSizeRender.jpg

2. Gather your inspo. After you’ve skimmed through Pinterest and Instagram, what’s the reoccurring theme in your inspo photos? Are there similar treats or flowers in every photo? Put all your photos into a collage, so you’ve created yourself a moodboard that you can easily share with the baker, florist, and all the decorators lending a helping hand! It’s key to ensure everyone’s on the same page with your vision.

IMG_5172.JPG
IMG_5231.JPG

3. Shop your home. As someone who loves decor and entertaining (and the daughter of someone who loves it just as much), I had LOTS of inventory to work with, so I had to be resourceful. We have cake stands and platters up the ying yang, so it was just a matter of me gathering my favourites together (without her noticing anything was missing from her house), shopping my own home for all my marble slabs, cutting boards, lanterns and vases, and putting them all together. I also used jewelry boxes and dishes for the table, and I had some wooden stumps lying around (originally sourced for an event that never happened *cough* LOL), so I kindly asked my Dad if he could cut them into wood rounds for the dessert table. And he KILLED IT. I scattered the wooden rounds throughout the room, and they elevated the look of the whole event!

IMG_5226.JPG

4. Choose a focal point. What’s gonna make your table stand out? Will you have a balloon garland along the top, a hanging sign in the middle, or a full backdrop? I decided to create a full DIY floral backdrop. This took a lot of thought as to how I would hang everything because I couldn’t put any holes in the wall, but it all worked out perfectly. I’ll definitely break down how I made my floral backdrop in another post!

IMG_5236.JPG
IMG_5171.JPG
IMG_5251.JPG

5. Sketch out your table. This way, you’ll figure out what you’re missing, and what you still need to do. I had a running list week after week of what I needed to accomplish before the big day. The sketch also helped tremendously when I was setting everything up. It’s easy to forget the vision in your head when you’re overwhelmed with to do’s, but if you draw it out beforehand, you’ll be able to show the others helping you what you’re going for, and it makes your life a whole lot easier!

IMG_5174.JPG
IMG_5230.JPG

6. Pick your desserts. Based on your inspo photos and your sketches, you’ll get a good idea of how much dessert you need to fill the table, and what to ask for if people offer to bring/bake something. I knew a big cake was a must, but what about everything else? My Grandma is an incredible baker, so she made 3 types of cookies, and 2 different cakes. I also made Lavender cupcakes, we had hand-painted macarons, intricately designed cake pops, and bite-sized Food for the Gods. Let’s just say we had NO SHORTAGE of dessert.

IMG_5178.JPG

7. Eucalypus and twinkle lights. Period. My best tip for any party is to buy a whole bunch of silver dollar and seeded eucalyptus, and scatter it throughout the room. I put it all along the food table, mantle, dessert table, and made all the floral arrangements with tons of eucalyptus. In addition, I gathered all the twinkle lights I own, and scattered them all throughout the dessert table, inside of glass lanterns, and wove them along the cake stands. It adds such a magical touch!

IMG_5238.JPG
IMG_5232.JPG

8. Make your own floral arrangements. Nobody knows your colour scheme like you do, or your vision, for that matter. Floral arrangements are actually a lot easier than you think, so my advice is to buy a whole bunch of greens and flowers in your colour scheme, then break them apart and make your own arrangements to suit the vases you have on hand. Not only is this cheaper, but it looks so much better, and you’ll also feel better, knowing you made them all!

Hopefully this helps you out the next time you have to plan a party and want to create a show-stopping dessert table! If you have any questions about where I got certain things, or want more tips, feel free to email me, DM me on IG, or leave a comment below! Always happy to share. <3

xo

Linnea

Fall Kitchen Staples

Linnea A.

IMG_2919.JPG

Spending more time in the kitchen became one of my “must do” things after coming back from Sweden, especially after spending so much time in the warm, cozy homes of my loved ones and spending time with my cousins.

Their homes all had something special about them. You could tell that they all absolutely loved being at home, and that they all enjoyed spending time in their kitchens. The Scandinavian “hygge” lifestyle is no joke - it’s a real thing, and I try to embrace it as much as possible. If you’re not quite sure what a “hygge life” really means, to me, it means spending more time at home, living a slow, simple life, and appreciating the things you have, rather than searching for what you don’t. Also, it screams good, wholesome home cooked meals.

IMG_2920.JPG
IMG_2898.JPG
IMG_2907.JPG

My twin cousins, who I hadn’t seen since they were 14 (which was waaaay too long ago) LOVE being in the kitchen and cooking - so much so that they cook for their girlfriends everyday. Needless to say they inspired me to spend more time at home, and start spending some quality time in the kitchen, cooking wholesome meals as much as possible. So that’s exactly what I’ve been doing! And to help make time in the kitchen as enjoyable as possible, here’s a look at some of my most loved items in my kitchen.

IMG_2899.JPG
IMG_2908.JPG
IMG_2901.JPG
IMG_2889.PNG

DIY Succulent Pumpkin

Linnea A.

IMG_1654.JPG

It’s officially Thanksgiving here in Canada, and what better way to celebrate than with a centrepiece DIY! I absolutely love fall and all that comes with it (including pumpkin spice and everything nice).  For this year’s Thanksgiving centrepiece, I decided to put two of my favourite things together and make a succulent pumpkin! Follow along for the process and end result :)

IMG_1651.JPG

what you’ll need

  • Pumpkin or gourd of your choice

  • Various succulents

  • Knife

  • Big spoon or scoop

  • Marker or pen

IMG_1642.JPG
IMG_1652.JPG

let’s get to it​

IMG_1647.JPG

1. Before you do anything, arrange your succulents the way you want them in your pumpkin. Based on the size of your succulents, draw the circle you’re going to cut into your pumpkin. 

​2. Carve the circle and pull the top off your pumpkin. Scoop out all the guts until your pumpkin is completely clean, then give it a good rinse.​

IMG_1646.JPG

3. Now for the fun part! Take your biggest succulent out of its pot, and place it into the pumpkin in your desired spot. Repeat the process with all of your succulents until you achieve your desired arrangement. Wipe down the sides of your pumpkin, and voila! All set for turkey dinner.

IMG_1653.JPG
IMG_1649.JPG
IMG_1643.JPG

I can’t express how thankful I am for everything and everyone in my life - I’m blessed beyond and I’m grateful for that everyday! Special thanks to you guys for reading and continuing to inspire me :)

Happy Thanksgiving loves!

Xo

Linnea

Coconut Watermelon Cocktails

Linnea A.

IMG_1981.JPG

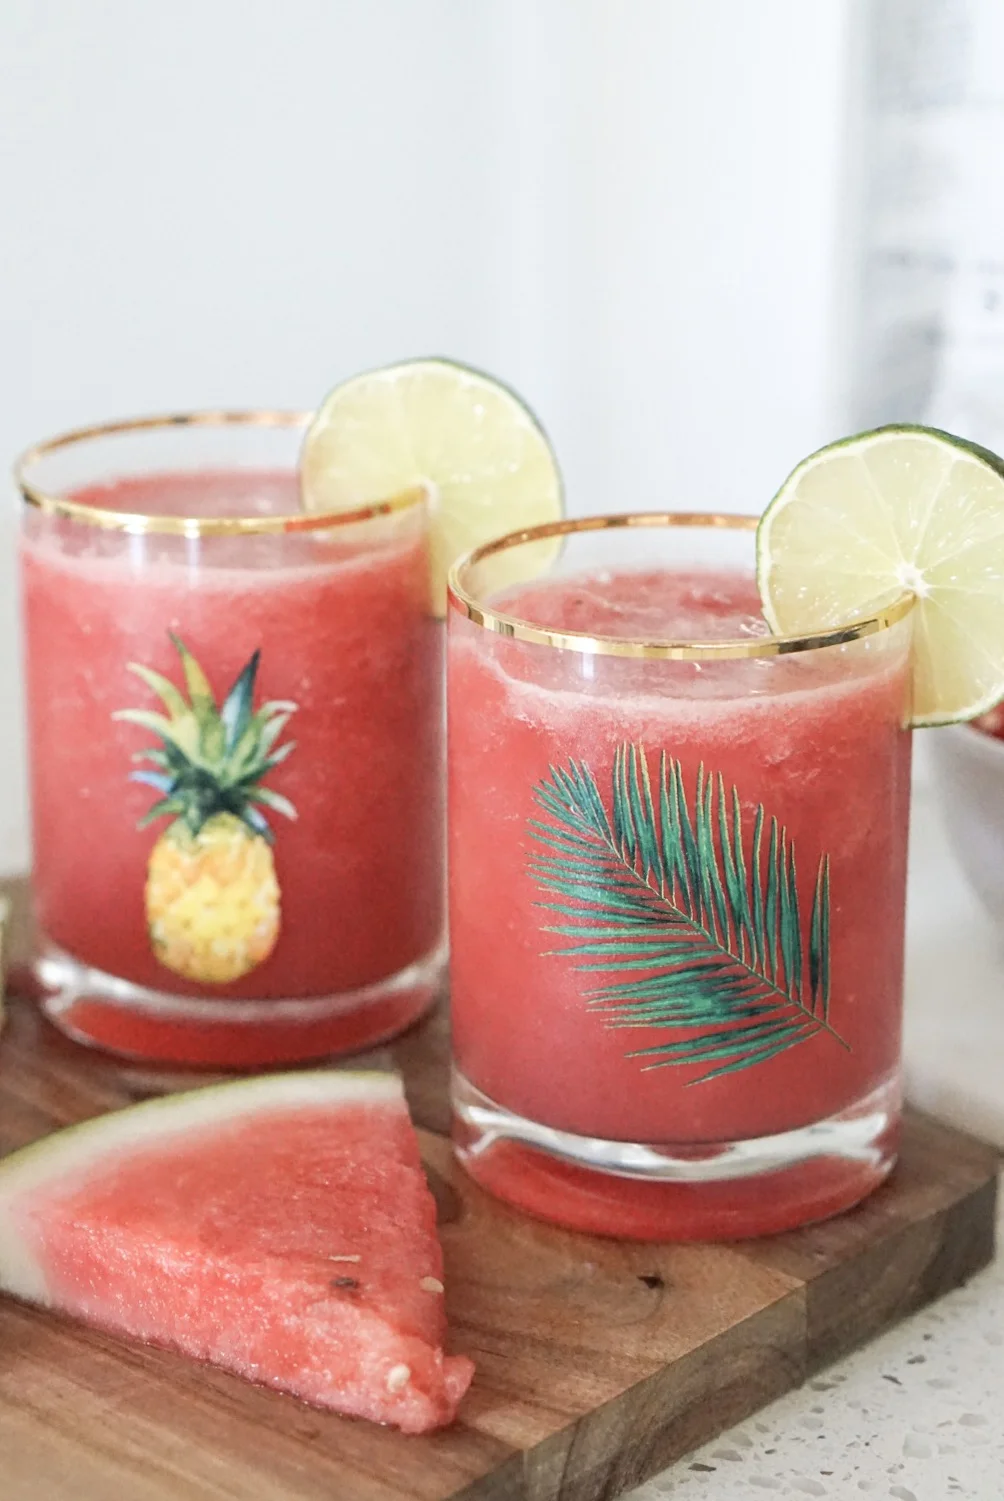
Summer has arrived, and it's no better time for a yummy cocktail, all while reaping the hydrating benefits of watermelon! This has been one of my favourite cocktails for quite a few years now, and I finally took the time to take some photos and share the recipe with all of you! Alright, I know you're thirsty, so here we go. 

IMG_1976.JPG
IMG_1983.JPG

Ingredients

  • Yield: 2 servings
  • 3 cups frozen ripe watermelon, diced
  • 2.5 oz Coconut Ciroc
  • 1/2 cup water (or coconut water, for extra flavour and electrolytes)
  • Squeeze of lime

Directions

Pour the vodka, splash of water, and watermelon into a blender, or Nutribullet, if that's what you have on hand like me. Blend, and test out the consistency. If it's too runny, add more watermelon. If it's a little too frothy, it's up to you whether you'd like more vodka or water. I think you know my preference ;)

IMG_2002.JPG
IMG_1977.JPG

Nutribullet Pro 900 | Pitcher | Glasses (similar) | Coconut Ciroc | Coconut Water

Et voila! A delicious, hydrating cocktail that's low in sugar, and oh so delicious. It's definitely on repeat as one of my favourite summer cocktails. Let me know if you give it a try!

xo

Linnea

Lavender Lemon Cocktails

Linnea A.

IMG_5094.JPG

It's no secret that I have a major obsession with lavender scented things... and the same goes for lavender flavoured things. Ice cream, kombucha, tea, cookies, bread, cocktails... pretty much anything that has a hint of lavender in it, I will looove. 

And with the sunshine finally making an appearance, it's the perfect time to share my favourite homemade Lavender Lemon cocktail, just in time for patio season. Here we go!

IMG_5091.JPG

Ingredients

IMG_5090.JPG
  • 1 oz. vodka
  • 1/2 lemon, squeezed (I like it tangy, but do this to taste)
  • 1 tsp. lavender lemon simple syrup
  • 1 can homemade lemon sparkling water (or La Croix)
  • Dried lavender, for garnish
IMG_5087.JPG

Directions

  1. In a cocktail shaker, pour 1 to 2 ounces of vodka (depending on what you need that day), followed by some lemon juice, and lavender simple syrup - the star of the show.
  2. Add some ice to your shaker and give it a whirl.
  3. Top your cocktail glass with your shaker creation, and finish with some lemon sparkling water for a little punch. Tip: if you'd like to add a hint of another flavour, top your cocktail with some mojito mint, and you're set! 

Cheers,

Linnea

Girls Night In: Fiesta Style

Linnea A.

IMG_2898.JPG

Although I'd love to be hosting my girlfriends on my patio right about now, the sun isn't quite out of hibernation yet - and it's still raining. All. The. Time. But the weather didn't stop me from planning a cozy girls night in. In fact, neither did my cleanse! So if you're curious to know how to throw a cozy girls night in, fiesta style - and "Wild Rose Detox" friendly, then you're in luck!

IMG_2900.JPG

I needed to think of a main dish that was not only cleanse-friendly, but appetizing, too. I thought about making curry, or simple chicken and veggies, but that sounded boring to me. So, I decided to turn our girls night into a Mexican fiesta - tacos, guac, jalapeños and all. Throw in a few boardgames, good music, and you have the perfect girls night in. And lucky for you, I've included all of my recipes below!

IMG_2892.JPG
IMG_2893.JPG

Cajun Fish Tacos

  • 4 mahi mahi filets
  • 2 tsp chili powder
  • 1 tbsp smoked paprika
  • 1 tbsp chipotle seasoning
  • Salt and pepper
  • 2 limes, for garnish
  • 2 cups shredded cabbage
  • 1 jalapeño, minced
  • Corn tortillas
  1. Mix all of your dry ingredients together in a bowl.
  2. Drop the fish into the dry mix, and rub the spices in. Make sure you fully coat every piece!
  3. Cut and dice your remaining veggies and toppings.
  4. Grill your fish for 3-4 minutes each side, or until cooked. 
  5. While the fish is cooking, sear your corn tortillas with a dash of avocado oil in a separate skillet.
  6. Top with guacamole, red onions, and jalapeños. Mango and corn are always a good idea too! Mmm mmm. 
IMG_2894.JPG
IMG_2897.JPG

Homemade Guacamole

  • 3 large ripe avocados
  • 1 lime, juiced
  • 1/2 tsp pink Himalayan salt
  • 1/4 cup diced red onion
  • 1 tsp red chili flakes
  • 1 tsp smoked paprika
  • 1 ripe tomato, chopped (seeds and pulp removed)
  • Pinch of pepper
  • Hot sauce (omit if on the Wild Rose)
  1. Mash avocados with a fork, but don't over mix - chunky guac is best!
  2. Add salt, lime juice, and remaining ingredients. Do a little taste test to make sure you're not missing anything.
  3. If you're making this ahead of time, use plastic wrap to store the guac in the fridge (without air) until it's fiesta time. 
IMG_2961.JPG
IMG_2907.JPG

Smoked Cauliflower Tacos

  • 1 head cauliflower
  • 2 cups corn
  • 1 tsp red pepper flakes
  • 1 tsp chili powder
  • 2 tsp smoked paprika
  • 2 tsp garlic powder
  • Salt and pepper
  • Corn tortillas

I also decided to make yam fries on the side, so for those, you'll need:

  • 4 yams, sliced 
  • 1 tsp onion salt
  • 1 tsp chipotle seasoning
  • 1 tsp smoked paprika
  • Salt and pepper
     
IMG_2963.JPG
  1. After chopping your veggies, spread out the cauliflower, corn and yams on separate baking sheets. Sprinkle and toss with the spices and avocado oil.
  2. Roast everything at 425 degrees for 15 minutes, or until crispy.
  3. In the meantime, lightly sear your corn tortillas in a skillet on each side.
  4. Top each tortilla with your cauli-corn mixture, and add your desired toppings. Great options are salsa, guacamole, and of course, Cholula. Gotta have the Cholula! 
IMG_2903.JPG

At my topping station, I included diced mangoes (omit on WR), jalapeños, corn salsa and fire roasted tomato salsa (omit on WR)... because we all know the toppings are what make your tacos!

IMG_2906.JPG

Typically, I'd be serving margaritas, or festive cocktails to suit the food... but my girlfriend and I opted for La Croix (my fave) and wine for the rest of the girls. We had a great time catching up, playing board games and indulging in some juicy raspberries for dessert.

IMG_2902.JPG

And there you have it - a festive girls night in, with delicious, healthy (dairy free, gluten free) whole foods. Let me know if you try any of these recipes in the comments!

Happy fiesta-ing,

xo

Linnea