123 Street Avenue, City Town, 99999

(123) 555-6789

email@address.com


You can set your address, phone number, email and site description in the settings tab.
Link to read me page with more information.

Home

Filtering by Category: Decor

Before & After: My Bedroom

Linnea A.

IMG_2571.JPG

I took a little break from sharing the spaces in my home because I always feel like my spaces are never fully "complete", so I keep putting these posts off, but today, I'm doing it anyway, back at it with my bedroom! My goal for this room was to take advantage of the big window, paint the walls white so the room was as bright as possible, and keep my decor and furniture minimal. I wanted a relaxing oasis, without having to purchase a whole bunch of new furniture.

The Before

edba14c487e93fe51de5ebbc31948c4a88c39e9f.jpg

The paint colour says it all - really made the room feel smaller than it was. And those curtains... I can't!! A touch of paint and a little bit more style goes a long, long way.

The Inspiration

wff.jpg

I take inspiration from other decor bloggers, influencers, and designers that share their masterpieces on Instagram. Personally, I find Instagram to be the most relevant, real-time resource for inspiration, because Pinterest is a little too dated for me. Maybe it's the boards I'm following, but I don't seem to get as inspired on Pinterest as I do when I'm scrolling through Instagram! Also, I loooove to save photos to different collections on Instagram - I've basically made it my new Pinterest. I save everything from wish list items to decor inspo, travel hot spots to photo and outfit inspo, and more. You'd be shocked at how many collections I have on there!

The After

Once I painted the room and placed my furniture how I wanted it, it made all the difference. This room is a little smaller than my last one; I didn't have room for my dresser, so I utilized storage space under my bed for items I don't use all the time, and transformed part of my closet into pull out drawers for things like socks and all that jazz. #Condoliving at its finest, y'all.

IMG_2572.JPG
IMG_2575.JPG
IMG_2569.JPG

I also fully utilized my second closet in the room for my jewelry, bags, accessories, heels, and shoes that I don't wear on a day-to-day basis.

IMG_2568.JPG
IMG_2574.JPG

Lastly, my obsession with hats and bags took on a whole new level, and I had a blank wall beside my bed. So what did I do? Looked to my command hooks, of course! Yes, you better believe I put zero holes in my wall for this. They're all held up with command strips!

IMG_2567.JPG
IMG_2570.JPG
IMG_2563.JPG

I'd still say my bedroom is a work in progress, but I'm pretty satisfied with how it turned out. Things that are still on my wish list include... a big print above my bed, a nice jute rug, sconces, and a blanket ladder. Help a girl out if you know where to find a light, beachy wood ladder!

IMG_2573.JPG
IMG_2565.JPG

Shop the Look

Headboard (similar)Table Lamp | Throw Pillows | Rug | Nightstands | Belly BasketBeddingPlant Hanger (similar) | Coasters | Linnea's Lights Candle | Round Rattan Bag | Mesh Market BagStraw Woven Bag | Necklace Holder: DIY

What room would you guys like to see a B+A of next? Let me know in the comments below :)

xo

Linnea

Secrets to Tackling a Gallery Wall

Linnea A.

IMG_9337.JPG

I've had gallery walls in every single place I've lived in, and it's no coincidence! They're the easiest way to make an impact in a room (next to paint), all while letting your interests and design style shine. I always tend to put a gallery wall above my bar cart, because it just makes it look so much better. There's something amazing about pictures in frames - they can transform a space in a matter of minutes! The biggest hesitation with gallery walls that I hear is that people don't like putting holes in their walls... well I have a big secret!

IMG_9336.JPG

no hole no problem

Never once in my 3 apartments have I ever put up a gallery wall with nails. I have always used command strips. At first, I used them because I was renting, and I didn't want to have to patch any holes and repaint everything. I quickly realized how amazing they were, and I've been using them for pretty much everything ever since. 

mix it up 

Once you pick up your command strips, you gotta start looking for your frames. Some people like uniform frames of different sizes, but I prefer a mixture of colours, sizes and textures to keep the wall interesting. If I can, I mix new frames with vintage ones, and include mats in some frames, and no mats in others.

IMG_9330.JPG

3D is key

I also love to include something unexpected on the wall, like a magnifying glass, a stag head, unique hook, or a vintage keepsake. There's nothing worse than a boring, predictable gallery wall. Add some 3D interest, and you'll love it more than you ever thought!

IMG_9332.JPG

get on my level

You can put up a gallery wall by yourself (I've done it many times), but it does help to have another eye when you're making sure everything is level, especially when using command strips. I usually balance my mini level on the top of the frame, place it on the wall where I want it, make sure it's leveled, then push it into the wall to make sure the command strips are secured.

the best prints in life are free

I used to buy prints, but I don't even remember the last time I did that. What's the point? There are so many images and free prints out there that you can take advantage of. My favourite photos are on Unsplash, which is like iStock, but not. Waaay cooler, and all free. I also love flipping through *quality* magazines and coffee table books for prints that I love. You'll appreciate the print more on your wall than you will in the book, so why not? May as well make the most of your book.

IMG_9329.JPG

similar tones

Lastly, when choosing your prints, make sure they all tell a similar story and have common tones throughout them. You don't want to have overly-saturated photos next to airy vintage looking snaps. Place all of your prints side by side, and move them around; pick and choose until you find a combo that you absolutely love. It's ok if you sleep on it, because getting it right takes time. The magic of a gallery wall is that you can literally switch out the prints whenever you want, depending on your mood.

Where are your go-to places to pick up gallery wall prints? Leave them in the comments below!

xo

Linnea


Linen Bedding

Linnea A.

IMG_2491.JPG

Spring has sprung, and I've completed a spring refresh, as well as a ton of spring cleaning around my home. Cleaning and decluttering aside, one of the updates I made was the switch to linen bedding. Maybe it's the breathability, or the washed-linen look, but I love it so much, and it's definitely worth the investment. If you're looking for a fabric that immediately transforms your bedroom into a relaxed, coastal getaway, this is it! Here are some of my faves:

hmprod.jpg

Washed linen duvet cover set, H&M Home


4548718198542_02_1260.jpg
linen-duvet-cover-set-white-lp-000_1280x.jpg


Linen Duvet Cover Set, Parachute

31211402_010_b.jpg


Soft-Washed Linen Duvet Cover, Anthropologie


Sweetest dreams,

Linnea

Floating Shelf Inspo

Linnea A.

I've been planning on putting up floating shelves in my kitchen for a while now, and I think the time has finally come to get cracking and do the damn thing! I plan to store some extra plates, mugs and knick knacks on the shelves, so they have to be durable and strong enough to hold everything - without ripping the wall out. I thought about hiring someone to make the shelves, and put them up (because my walls have concrete behind them), but I think I've decided to just do it myself. A little DIY can't hurt nobody... or can it...

Either way, I'm sharing a round up of my favourite kitchen shelves I've come across thus far, in hopes to create a similar look with mine - coming soon! Of course, I'll take you through the whole DIY process once I get there.

IMG_4365.PNG

If you have any great DIY shelf tutorials, I'd love to hear about them! 

xo

Linnea

How to Style a Nightstand

Linnea A.

IMG_3887.JPG

As the first and last area you see when you wake up and when you go to bed, your nightstand holds a lot of importance. And believe it or not, the way it's styled, the things that are on it, and its cleanliness can either help with a restful night's sleep, or discourage any sleep at all. It should be home to some of the things you love, your holy grail bedtime products, and maybe even a book or two that you're reading at the moment. If you're unsure of exactly what should be on your nightstand, below are my go-to guidelines.

Books you're currently coveting

Although we're all guilty of it, technically, the bedroom should be an electronic-free zone, and your phone should either be charging away from the bed, or in another room. This is something I'm working on, but to help stop habits, you usually need something to replace them with. My solution? Books! I'm proud to be part of a book club (who I love very very much - my friends are the bombdiggity), so I'm always reading 2-3 books at a time. Having the books I'm reading on my nightstand is not only a good reminder to read the books, but promotes screen-free time before bed. And bonus - your books will make your nightstand look well styled in a matter of seconds! 

IMG_3894.JPG

Lighting

Speaking of reading in bed, you'll need some lighting to be able to see what you're doing. Lighting can make ALL the difference in a room, so make sure you invest in some classic table lamps or wall sconces - ideally in a style that's complimentary to your bed. 

Coasters

If you're an avid water drinker (sparkling is my preference) like I am, you likely need some coasters on your bedside table. My home has no shortage of coasters - I'm sure everyone I know can attest to this, so you better believe I've got a few hanging out on my nightstand.

IMG_3881.JPG

Beauty products

I have quite a few holy grail products, and I find that if I see them, I remember to use them. This is no different for night time products. And usually, my beauty products are aesthetically pleasing too... because branding gets me every time. I am in Marketing, so... duhh. Lay your favourites out on your nightstand, and you're good to go!

IMG_3879.JPG

Scents

When I need to relax, I love to light a soy candle or diffuse some lavender essential oil to help me sleep. Both work well, but if you're not staying up for long in bed, just put your diffuser on, and to sleep you go! My favourite diffusers and blends (refresh is my absolute fave) are from Saje Wellness, but they're available pretty much everywhere now.

IMG_3880.JPG

Flowers, plants or both

Fresh flowers on the nightstand aren't an absolute must, but they do make a tremendous difference. Sometimes, buying roses or fresh flowers every now and then is worth your while, especially if they boost your mood. And of course, for everyday essentials that aren't so pretty, utilize the storage in the drawer of your nightstand. I keep all my evening vitamins there, so I remember to take them before bed. Once you have these key pieces, add some personal flare, and you'll get a restful night's sleep in no time. Let me know what your nightstand favourites are below!

xo

Linnea

Before & After: My Console Table

Linnea A.

IMG_2191.JPG

As one of my favourite spots in my home, my console table serves many purposes for my living room. I've used it as a desk, a makeup vanity, an extra dining table... so versatile!

IMG_2656.JPG

You seemed to love the before and after of my entryway, so I decided to do the same with this area of my home. Here's how it looked before I moved in:

The Before

0ee2c2239cdbbf815d3fe523a6d83408950cb350 6.jpg

The paint colour, the light fixture, the mirror... it all had to go. So of course, the first thing I did was paint the walls white - it makes such a tremendous difference, and it's therapeutic too.

The Inspiration 

The majority of my inspiration for this area came from Katie of Halfway Wholeistic - I love her home, and she's super sweet, too. When you're looking for inspiration, look for spaces that are similar to yours, and pick things you love from the way they're styled and decorated, using things you already have. Before you know it, you'll have all the pieces to tie it all together.

The After

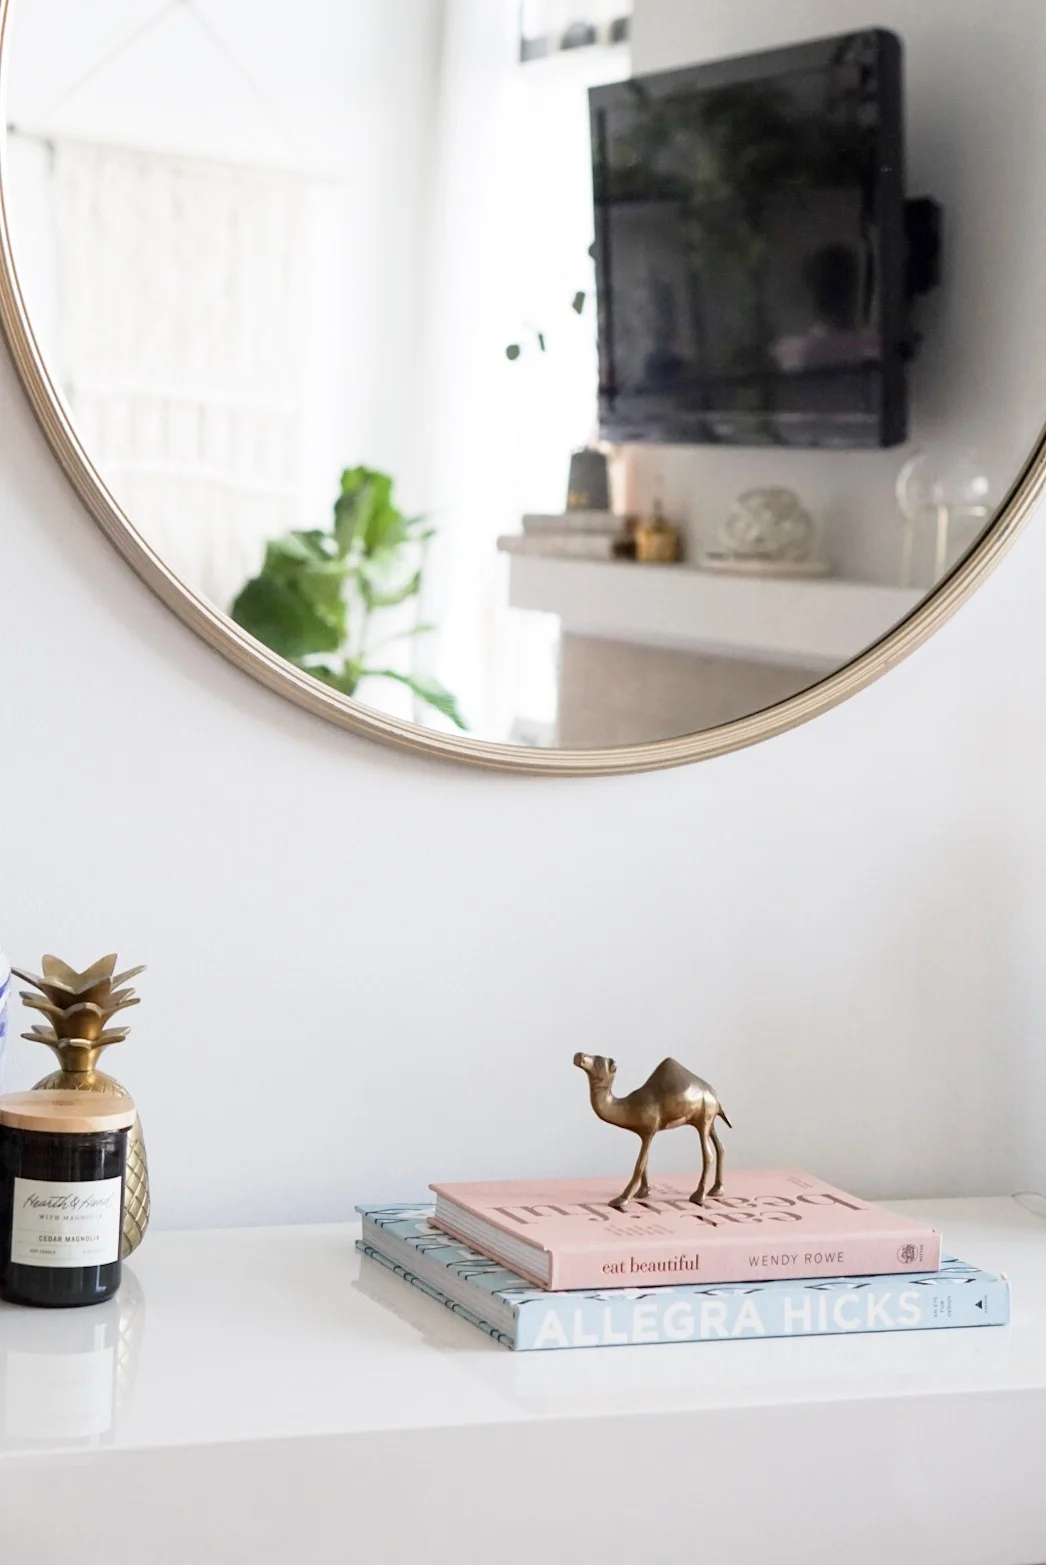
I knew I wanted a circular mirror, so I was thrilled to find one just a few weeks before moving into my new place. It's funny how things happen like that! Once the walls were painted, I replaced the awful light fixture with one I purchased while I was house hunting - probably one of my favourite things in my home. After those were in place, I accessorized around those pieces. I layered in some candles, my mom's vintage ginger vase, books, a vintage brass camel I found at a second hand shop, and of course, my diffuser.

IMG_2188.JPG
IMG_2659.JPG
IMG_2715.JPG

I change the decor on the table quite often, depending on the season or my mood, but that's the beauty of decor. Looking for console table must haves? I've linked similar options to mine below.

Shop the Look:

IMG_2724.PNG

Before & After: My Entryway

Linnea A.

IMG_1353.JPG

Entryways are a little underrated, because they're pretty much like hostesses; they're the first thing you see when you walk into a space, and the last thing you see before you leave. Because of this, they're pretty important when it comes to first (and last) impressions.

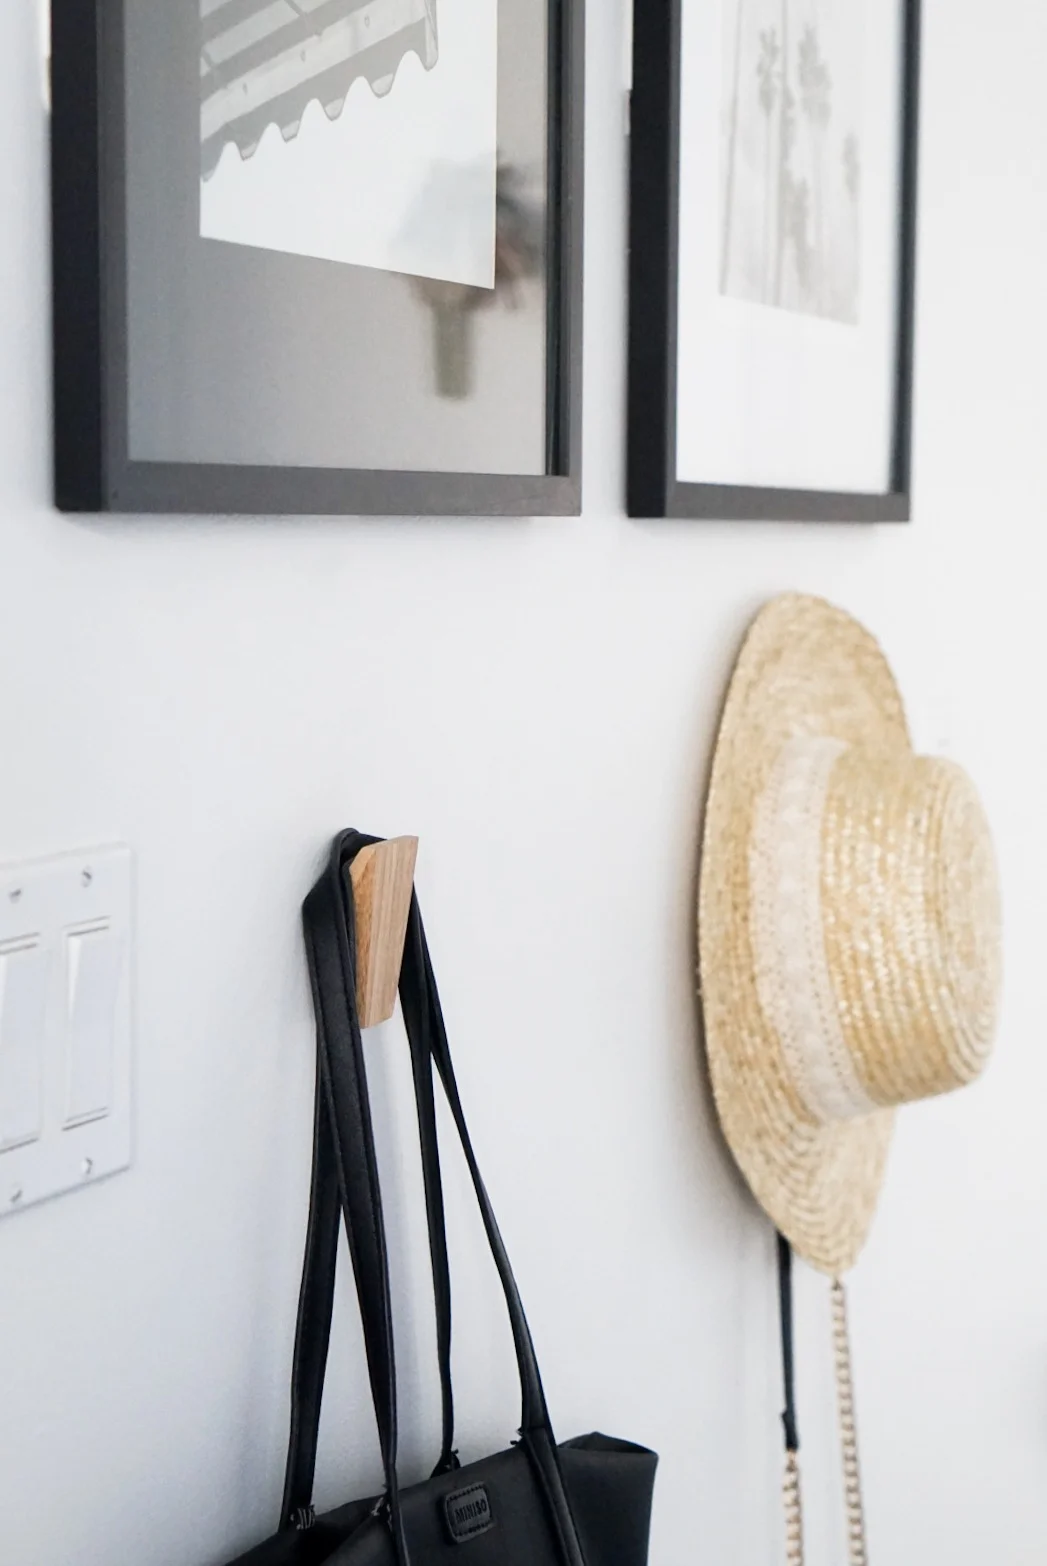
Overall, my entryway is limited in terms of size, but I still wanted to create a functional space that set the tone for the rest of the apartment. I needed some hooks for Dash's leash, my purse, and the jacket or hat I happened to be wearing that day... so the search for entryway inspo began.

IMG_1856.JPG

Major renovations weren't needed quite yet, but I still wanted to give my entryway a little face lift. Here's the transformation from move-in day to now:

The Before

2rfe.jpg

As you can see in the before photo, the walls were builders' beige, bane of my existence! The very first thing I did (even before moving in) was paint the entire apartment white. I painted the whole place with my mom - just the two of us. I was originally thinking of hiring someone to paint my place because of the extremely high ceilings, but at the end of the day, it just wasn't worth it. Plus, we know a thing or two about handling a paint brush, and we love painting!

The Inspiration

Once I established the design style of my other spaces, I moved onto the entryway. I started searching for entryway inspiration, and when Alaina Kaczmarski gave me just the inspiration I needed, I got pretty darn close to what I was looking for. All I needed were some wall hooks, prints, a light fixture, and some frames. 

The After

To begin the transformation, the light fixture just had to go. The fixtures that came with my apartment were pretty hideous (as you can see above) so I went on the hunt for a something that paired well with my other fixtures, and suited the rest of the space.

IMG_1858.JPG
IMG_1855.JPG

Next up, the frames and prints. I wanted to keep it pretty simple because I already have a gallery wall in the living room, so I stuck to two prints of similar subjects.

When you're looking for prints and photos, my best advice is to look for free high-res images (aside from your own), on Unsplash. They have so many to choose from, and 9 times out of 10, everything will match if you make it gray scale!

IMG_1857.JPG

For the hooks, I decided to opt for wood because I needed to add some warmth to the space. Once those were up, I accessorized with an umbrella stand and a doormat, and the transformation was complete!

IMG_1853.PNG

Gold Pendant (splurge) | Gold Pendant (save) | Frame & PrintWooden Wall Hooks | Umbrella Stand | Doormat

The transformation just goes to show what can be done with a little bit of paint and wall art! I'm working on giving a few other spaces some love, but in the meantime, what else would you like to see? Let me know in the comments below.

xo

Linnea

Bar Cart Essentials

Linnea A.

IMG_1378.JPG

I've had my bar cart for 6 years now, and it's stuck with me ever since I moved out (as most of my pieces have). My friends used to call me the “bar cart queen” because I was obsessed with everything bar cart-related, and my cart was always styled differently every time they came over. When bar carts were "the thing" to have, you better believe I was all over it. It's safe to say it’s gone through a lot, but it's an extremely versatile piece…I've even used it as a TV console before!

IMG_1377.JPG

Now is no different, but my style has definitely evolved since then. I style the cart with sophisticated pieces, and use lots of black, gold, greenery and glass. I used to use my bar cart as a practical item, stocking it with every single bottle of alcohol I had in the house, but that doesn’t always prove to be the most aesthetically pleasing. So, to keep things simple, I only buy bottles of liquor that look good on the cart (and 9 times out of 10, they taste way better too), along with books, glasses and cocktail accessories.

IMG_0453.JPG
IMG_1399.JPG

Liquor (& Lavender)

I keep my bar cart pretty minimal now in terms of liquor... you’ll only find vodka, tequila, gin and wine. Oh, and don’t forget the lavender syrup (my obsession with lavender anything is off the charts, in case you didn't know). It’s mind-blowing, and makes everything taste better.

IMG_1400.JPG

Tray or Basket

Begin gathering your bar cart essentials by setting aside the bottles you wish to display, and finding a tray or coffee table book that they’ll sit nicely on. If you love wine, you likely have a wine rack, so choose a spot towards the bottom of the cart, and fill your rack with similar bottles (or multiples of your fave) for a cohesive look. I have a mirrored tray on the top of my bar (which I do switch out from time to time), that holds some bottles, glasses and silver shot glasses for a metallic pop.

Cocktail Accessories

Next, gather your cocktail accessories. These include coasters, a wine crank, bottle opener, strainer, etc. Maybe you have them styled in a cute shaker or organized in a set, but either way, make sure they’re handy for your next get together.

IMG_1395.JPG

Books & Candles

Lastly, add décor wherever you feel is lacking some love. Stack or lean some cocktail books, add a vase with some florals or greenery, and maybe even a candle or two. It also helps to have some non-alcoholic options for mix on hand, so stock up on those too! To make your life a little easier, here are some of my bar cart must-haves:

IMG_1079.PNG

1 | 2 | 3 | 4 | 5 | 6 | 7 | 8 | 9 

Happy styling! 

xo

Linnea

Patio Moodboard

Linnea A.
AB801BA6-1387-4C0A-B5AC-4439630BC19C.jpg

Call it the luck of the draw, but for some reason, I keep lucking out with patio space, which is quite rare where I live. I didn't get to spend much time on my patio last summer, so this year, I plan on spending plenty of time out there.

Before patio season begins, I wanted to create a moodboard for my patio vision. That way, I can walk through the process of bringing my moodboard to life in a future post. I'm also a firm believer that if you put things out into the universe, they'll happen... so let's give this a shot.

I already have my key outdoor pieces, including my sectionals, rug, storage chest, etc., but there are still a few things I'd like to add to make the most out of the space. Let's get to it - here's my 2018 patio moodboard:

IMG_0925.PNG

Mudcloth Throw Pillows | Cement Planters | Sectional | CactusCement Coffee Table | Plant StandsOutdoor CandlePapasan Chair | Throw Blanket | Straw Pouf | Ceramic Stool

Here's to hoping my patio dreams come true! Until next time...

xo

Linnea

Shelfie Styling 101

Linnea A.

IMG_9683.JPG

Bookshelves have been popular for a while now... and I know because I've had my trusty Ikea Vittsjö shelf ever since I moved out (almost 6 years ago, omg) and I've loved it ever since. It's been with me in every single home I've lived in, so it's grown with me throughout the years, and I've changed what it displays many, many times. Styling a shelfie  can be a little tricky, but my hope is to break it down to be a little easier for you.

IMG_9656.JPG

Clean every surface

To begin, take everything off of every shelf, and clean every surface. You can't have a sharp looking bookshelf if it's dusty!

IMG_9684.JPG

Style your books

Next, visualize where you'd like to store your books. I like to scatter my books diagonally, so that there aren't too many of the same vignettes happening next to each other. Books can be stacked either on top of one another, or with the spines displayed vertically. It really depends on the size and composition of the book! For paperback books with less-than-lovely covers, try flipping them the other way, so you have a uniform display of the neutral-toned pages. 

IMG_9654.JPG

Shop your home

Once you're happy with the way your books look, it's time to shop your home. This is where you get out your vases, tealight holders, heirlooms, plants, frames, purses, perfumes, and whatever else you have lying around without a home. Use your books as your base, and scatter the other knick-knacks around them. Trial and error is key here!

Plants, plants, plants

Greenthumb or not, plants really do make the room come together, so make sure you have lots of them! They're super affordable, and they pair well with almost everything. 

IMG_9676.JPG

Find additional storage

One of my favourite pieces on my bookshelf is my mom's antique ginger jar. She brought two of them all the way from the Philippines when she moved to Canada, so they're sentimental pieces that I'll always have in my home (or as long as she lets me keep them lol). And bonus! They act as a great storage space for extra chargers and things I don't want lying around in plain sight.

IMG_9687.JPG

Balance is key

Make sure you balance the weight of your items, and play with varying heights. Don't be afraid to lean frames against the wall, or have plants growing off the shelves. Once you're happy with how your shelves look, take a step back, and embrace your creation! The shelf should be full of items that bring you joy, and in turn, seeing it everyday will make you happy. 

SHOP THE LOOK

 Jo Malone Cologne | Viktor & Rolf Flowerbomb | Gold plant standThe Coveteur | Three Times a Day | All in Good Taste | SHE by Kate Spade

And that's it, styling complete!

xo

Linnea

How to Style a Coffee Table

Linnea A.

IMG_9472.JPG

Despite being small, coffee tables are mighty, and can make a significant impact on a room. They often act as an anchor for your living space, so you want to make sure you style it to showcase all the things you love! Depending on the size of your coffee table and its purpose (I eat at mine more often than I'd like to admit), styling it can get a little difficult, especially if you don't know where to start.

IMG_9640.JPG
IMG_9468.JPG

To begin, pick a coffee table that fits in your space, whether that be round, square or rectangular, and choose something that pairs well with your other furniture, especially your couch. Next, use a few of your favourite coffee table books to ground the table, and set a base for the beautiful objects on top! Before going on the hunt for new books, shop your own home - I'm sure you have some good coffee table books lying around somewhere (and yes, they're called coffee table books for a reason)!

Again, depending on the size of the table, either on top or next to the coffee table books, I usually look for either a tray, basket or marble slab to act as a "command" centre for all the knick-knacks I put on top.

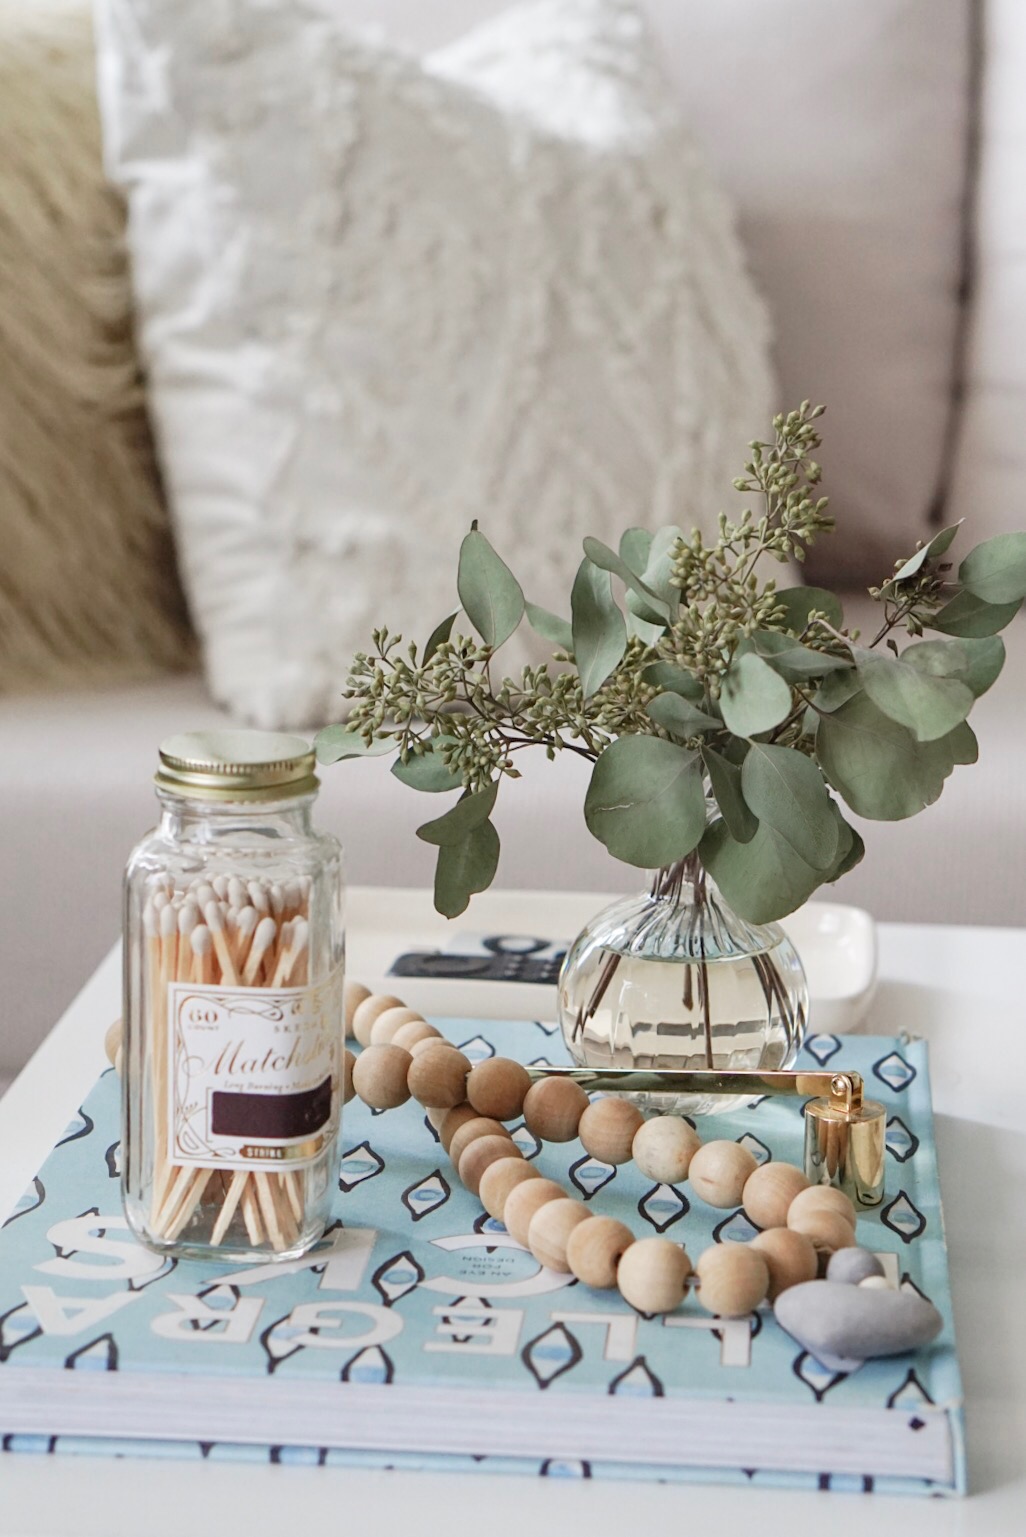
Now that you have your base, it's time for the fun part! A short vase with your favourite flowers or greenery (my love of eucalyptus is so real) is a staple for a well-styled coffee table. I don't always include flowers, but if you're having a get together with friends, or simply feel like treating yourself, a coffee table is a great place to put those bad boys on display.

IMG_9470.JPG
IMG_9469.JPG

Next, think about what you use your coffee table for. If it's a space where you put your glass, invest in some nice coasters to put on display. If you like to light candles every night, pick up a nice candle of your choice, some cute matches, and a gold wick trimmer (my friends think I'm crazy for this one but I really do use mine all the time)! 

Lastly, add objects that you love to look at on a daily basis to add interest to the table. I love draping wooden beads on top of my books, and I have a crystal tealight that was my very first purchase from one of my favourite stores (The Cross Design), so it's a special piece to me, and it will definitely be on display in my home forever. 

IMG_9471.JPG

Wooden Beads | Matches | Wick TrimmerMarble Coasters | Coffee Table Book | Glass Vase | Marble & Wood Cutting Board | Dish

Once you've chosen your pieces, it's time to rearrange, and rearrange again. Play around with the placement of the objects until you find a combination you like. It's all about trial and error here. Once you're happy with it, voila! 

Do you have any coffee table staples that you can't live without? I'd love to hear about them in the comments! 

xo

Linnea