123 Street Avenue, City Town, 99999

(123) 555-6789

email@address.com


You can set your address, phone number, email and site description in the settings tab.
Link to read me page with more information.

Home

May Moodboard

Linnea A.

IMG_3845.PNG

May, you're going to be one incredible month, I can feel it! Patio parties, New York City, Toronto, DIY projects around the house, spring sunshine, plenty of time spent with my girls... the list goes on. And did I mention how excited I am to be reunited with my bests on the east coast?! Can't handle it!! Believe it or not, this will be the first trip (that's not for business) that I'm taking on my own, and I literally cannot wait to explore the Big Apple solo dolo! Let's just say I won't be surprised if I'm convinced to move there :) Let's do this May 💕

Xo

Linnea

How to Style a Nightstand

Linnea A.

IMG_3887.JPG

As the first and last area you see when you wake up and when you go to bed, your nightstand holds a lot of importance. And believe it or not, the way it's styled, the things that are on it, and its cleanliness can either help with a restful night's sleep, or discourage any sleep at all. It should be home to some of the things you love, your holy grail bedtime products, and maybe even a book or two that you're reading at the moment. If you're unsure of exactly what should be on your nightstand, below are my go-to guidelines.

Books you're currently coveting

Although we're all guilty of it, technically, the bedroom should be an electronic-free zone, and your phone should either be charging away from the bed, or in another room. This is something I'm working on, but to help stop habits, you usually need something to replace them with. My solution? Books! I'm proud to be part of a book club (who I love very very much - my friends are the bombdiggity), so I'm always reading 2-3 books at a time. Having the books I'm reading on my nightstand is not only a good reminder to read the books, but promotes screen-free time before bed. And bonus - your books will make your nightstand look well styled in a matter of seconds! 

IMG_3894.JPG

Lighting

Speaking of reading in bed, you'll need some lighting to be able to see what you're doing. Lighting can make ALL the difference in a room, so make sure you invest in some classic table lamps or wall sconces - ideally in a style that's complimentary to your bed. 

Coasters

If you're an avid water drinker (sparkling is my preference) like I am, you likely need some coasters on your bedside table. My home has no shortage of coasters - I'm sure everyone I know can attest to this, so you better believe I've got a few hanging out on my nightstand.

IMG_3881.JPG

Beauty products

I have quite a few holy grail products, and I find that if I see them, I remember to use them. This is no different for night time products. And usually, my beauty products are aesthetically pleasing too... because branding gets me every time. I am in Marketing, so... duhh. Lay your favourites out on your nightstand, and you're good to go!

IMG_3879.JPG

Scents

When I need to relax, I love to light a soy candle or diffuse some lavender essential oil to help me sleep. Both work well, but if you're not staying up for long in bed, just put your diffuser on, and to sleep you go! My favourite diffusers and blends (refresh is my absolute fave) are from Saje Wellness, but they're available pretty much everywhere now.

IMG_3880.JPG

Flowers, plants or both

Fresh flowers on the nightstand aren't an absolute must, but they do make a tremendous difference. Sometimes, buying roses or fresh flowers every now and then is worth your while, especially if they boost your mood. And of course, for everyday essentials that aren't so pretty, utilize the storage in the drawer of your nightstand. I keep all my evening vitamins there, so I remember to take them before bed. Once you have these key pieces, add some personal flare, and you'll get a restful night's sleep in no time. Let me know what your nightstand favourites are below!

xo

Linnea

Spring Bag Overload

Linnea A.

IMG_3598.JPG

The cat's outta the bag... straw and geometric bags are taking the world by storm! And I'm so, so into it. I literally cannot stop myself from buying yet another straw bag... I don't even want to tell you how many I've got because it's getting out of hand lol. Maybe it's because they remind me of roaming the streets of Bali (or my favourite store in the world, Kim Soo), or because they immediately evoke feelings of carefree, sunny thoughts. Either way, I can't get enough, and I've already gathered quite the collection. Good thing they're pretty affordable, for the most part! 

IMG_3578.JPG

Here's a roundup of my favourites (but let's be real, the list will only get longer as more brands come out with them):

IMG_3577.PNG

Homemade Lavender Kombucha

Linnea A.

IMG_3491.JPG

As my housewarming present, my best friend Megan gave me the perfect gift - my very own kombucha set: scoby, organic cane sugar, black tea, a big jar... literally everything I needed to get my first homemade kombucha batch started. To make the gift even better, she gave me a full tutorial on how to make it the same day! Since then, I've been consuming homemade kombucha regularly, experimenting with different flavours and teas all the while.

If you're not familiar with what kombucha is, it's fermented, fizzy tea. The benefits are endless, as it helps with digestion, boosts your immune system, builds a strong gut, and has a load of b and c vitamins. And when you brew it at home, it couldn't be cheaper. Need I say more?

IMG_3407.JPG

Since I've been brewing at home for about 8 months now (omg, where did the time go), I thought I'd take you along for a recipe and tutorial for homemade Lavender Kombucha. Here's what you need to get started:

Let's begin by making a batch of original kombucha. You'll need to do this regardless of how you want to flavour it.

IMG_3409.JPG

Ingredients

Instructions

  1. Kombucha is made from bacteria and culture, so make sure you clean and sanitize everything with white vinegar to prevent any mishaps. To begin, boil approximately 1/2 a gallon of water to brew your black tea.

  2. Once the water is boiled, pour it into your glass jar and steep the tea bags for at least 15 minutes. Remove the tea bags, add the sugar and stir well to dissolve.

  3. Once the sugar has completely melted, add the remaining 1/2 gallon of cool water and let the mixture cool.

  4. Once the tea has cooled completely, carefully place the scoby in the jar with all of the starter liquid that came with your SCOBY. If this is your first batch and you don't have much starter liquid, buy an original flavoured kombucha, and add half a bottle of it to the tea.

  5. Cover the jar with a coffee filter or cheesecloth, and seal it with a rubber band. Place it in a dark, relatively warm spot, undisturbed by people or light.

  6. And now we let the fermentation begin! Let your kombucha to brew for 1-2 weeks, depending on your preference. The longer you leave it, the stronger it will become.

  7. After 1-2 weeks, your kombucha is ready. Carefully remove the scoby (I place mine in a sterilized bowl with some kombucha liquid for my next batch). If you want to leave your kombucha plain, this is the time to transfer your finished product to a pitcher, then swing-cap bottles. You can store it in the fridge for up to 1 month. If you'd like to do a second round of fermentation and flavouring, here's how to do that:

IMG_3493.JPG

Ingredients for Lavender Kombucha

  • 1.5 gallons homemade kombucha (made above)

  • 1 cup dried lavender buds

  • 8 organic black tea bags

  • 1 cup golden sugar

  • 1 gallon water

Instructions

  1. Boil 1 gallon of water, transfer to a pitcher, and add the teabags and lavender buds.

  2. Let the tea steep for roughly 10 minutes, and remove the teabags (not the lavender). Add your sugar, and stir until it's dissolved.

  3. Once the tea has cooled to room temperature, combine your prepared kombucha with your lavender tea (you may need to do this in batches with various pitchers/vessels in your home). Once both mixtures are thoroughly combined, pour the mixture into swing-cap bottles, and let them sit in a dark, warm spot for about 3 days.

  4. After 3 days, strain your kombucha into a pitcher, and pour the strained kombucha back into the swing-cap bottles (unless you want to strain the lavender out every time you drink it). Your bottles are now ready for refrigeration, and can be stored up to 1 month!

IMG_3492.JPG

It seems like quite a few steps, but trust me, it's easier than you think. You're basically just making various batches of sweet tea, except the bacteria in the kombucha eats all the sugar up, making a drink that's OH SO good for you! And the best part? Kombucha makes for an incredible cocktail mix :) Interested in more kombucha recipes? Let me know which ones you'd like me to try!

xo

Linnea

Mother's Day Gift Guide

Linnea A.

The women in my life are of the utmost importance, especially when it comes to my mom and grandma (or as I know her, my Farmor). As the years pass, it gets harder and harder to find something each of them will love for Mother's Day. So this year, I'm planning ahead of time, and sharing a round up of all of my Mother's Day favourites! You're sure to find something special in this gift guide, no matter what the women in your life love. 

For the homebody

IMG_3073.jpg
IMG_3078.jpg

Knot BasketMother's Day Tote | Phone Case | Jo Malone Candle | Gold WatchStraw Tote | Facial Oil 

Happy Mother's Day to all the mamas out there!

xo

Linnea


Girls Night In: Fiesta Style

Linnea A.

IMG_2898.JPG

Although I'd love to be hosting my girlfriends on my patio right about now, the sun isn't quite out of hibernation yet - and it's still raining. All. The. Time. But the weather didn't stop me from planning a cozy girls night in. In fact, neither did my cleanse! So if you're curious to know how to throw a cozy girls night in, fiesta style - and "Wild Rose Detox" friendly, then you're in luck!

IMG_2900.JPG

I needed to think of a main dish that was not only cleanse-friendly, but appetizing, too. I thought about making curry, or simple chicken and veggies, but that sounded boring to me. So, I decided to turn our girls night into a Mexican fiesta - tacos, guac, jalapeños and all. Throw in a few boardgames, good music, and you have the perfect girls night in. And lucky for you, I've included all of my recipes below!

IMG_2892.JPG
IMG_2893.JPG

Cajun Fish Tacos

  • 4 mahi mahi filets
  • 2 tsp chili powder
  • 1 tbsp smoked paprika
  • 1 tbsp chipotle seasoning
  • Salt and pepper
  • 2 limes, for garnish
  • 2 cups shredded cabbage
  • 1 jalapeño, minced
  • Corn tortillas
  1. Mix all of your dry ingredients together in a bowl.
  2. Drop the fish into the dry mix, and rub the spices in. Make sure you fully coat every piece!
  3. Cut and dice your remaining veggies and toppings.
  4. Grill your fish for 3-4 minutes each side, or until cooked. 
  5. While the fish is cooking, sear your corn tortillas with a dash of avocado oil in a separate skillet.
  6. Top with guacamole, red onions, and jalapeños. Mango and corn are always a good idea too! Mmm mmm. 
IMG_2894.JPG
IMG_2897.JPG

Homemade Guacamole

  • 3 large ripe avocados
  • 1 lime, juiced
  • 1/2 tsp pink Himalayan salt
  • 1/4 cup diced red onion
  • 1 tsp red chili flakes
  • 1 tsp smoked paprika
  • 1 ripe tomato, chopped (seeds and pulp removed)
  • Pinch of pepper
  • Hot sauce (omit if on the Wild Rose)
  1. Mash avocados with a fork, but don't over mix - chunky guac is best!
  2. Add salt, lime juice, and remaining ingredients. Do a little taste test to make sure you're not missing anything.
  3. If you're making this ahead of time, use plastic wrap to store the guac in the fridge (without air) until it's fiesta time. 
IMG_2961.JPG
IMG_2907.JPG

Smoked Cauliflower Tacos

  • 1 head cauliflower
  • 2 cups corn
  • 1 tsp red pepper flakes
  • 1 tsp chili powder
  • 2 tsp smoked paprika
  • 2 tsp garlic powder
  • Salt and pepper
  • Corn tortillas

I also decided to make yam fries on the side, so for those, you'll need:

  • 4 yams, sliced 
  • 1 tsp onion salt
  • 1 tsp chipotle seasoning
  • 1 tsp smoked paprika
  • Salt and pepper
     
IMG_2963.JPG
  1. After chopping your veggies, spread out the cauliflower, corn and yams on separate baking sheets. Sprinkle and toss with the spices and avocado oil.
  2. Roast everything at 425 degrees for 15 minutes, or until crispy.
  3. In the meantime, lightly sear your corn tortillas in a skillet on each side.
  4. Top each tortilla with your cauli-corn mixture, and add your desired toppings. Great options are salsa, guacamole, and of course, Cholula. Gotta have the Cholula! 
IMG_2903.JPG

At my topping station, I included diced mangoes (omit on WR), jalapeños, corn salsa and fire roasted tomato salsa (omit on WR)... because we all know the toppings are what make your tacos!

IMG_2906.JPG

Typically, I'd be serving margaritas, or festive cocktails to suit the food... but my girlfriend and I opted for La Croix (my fave) and wine for the rest of the girls. We had a great time catching up, playing board games and indulging in some juicy raspberries for dessert.

IMG_2902.JPG

And there you have it - a festive girls night in, with delicious, healthy (dairy free, gluten free) whole foods. Let me know if you try any of these recipes in the comments!

Happy fiesta-ing,

xo

Linnea

Before & After: My Console Table

Linnea A.

IMG_2191.JPG

As one of my favourite spots in my home, my console table serves many purposes for my living room. I've used it as a desk, a makeup vanity, an extra dining table... so versatile!

IMG_2656.JPG

You seemed to love the before and after of my entryway, so I decided to do the same with this area of my home. Here's how it looked before I moved in:

The Before

0ee2c2239cdbbf815d3fe523a6d83408950cb350 6.jpg

The paint colour, the light fixture, the mirror... it all had to go. So of course, the first thing I did was paint the walls white - it makes such a tremendous difference, and it's therapeutic too.

The Inspiration 

The majority of my inspiration for this area came from Katie of Halfway Wholeistic - I love her home, and she's super sweet, too. When you're looking for inspiration, look for spaces that are similar to yours, and pick things you love from the way they're styled and decorated, using things you already have. Before you know it, you'll have all the pieces to tie it all together.

The After

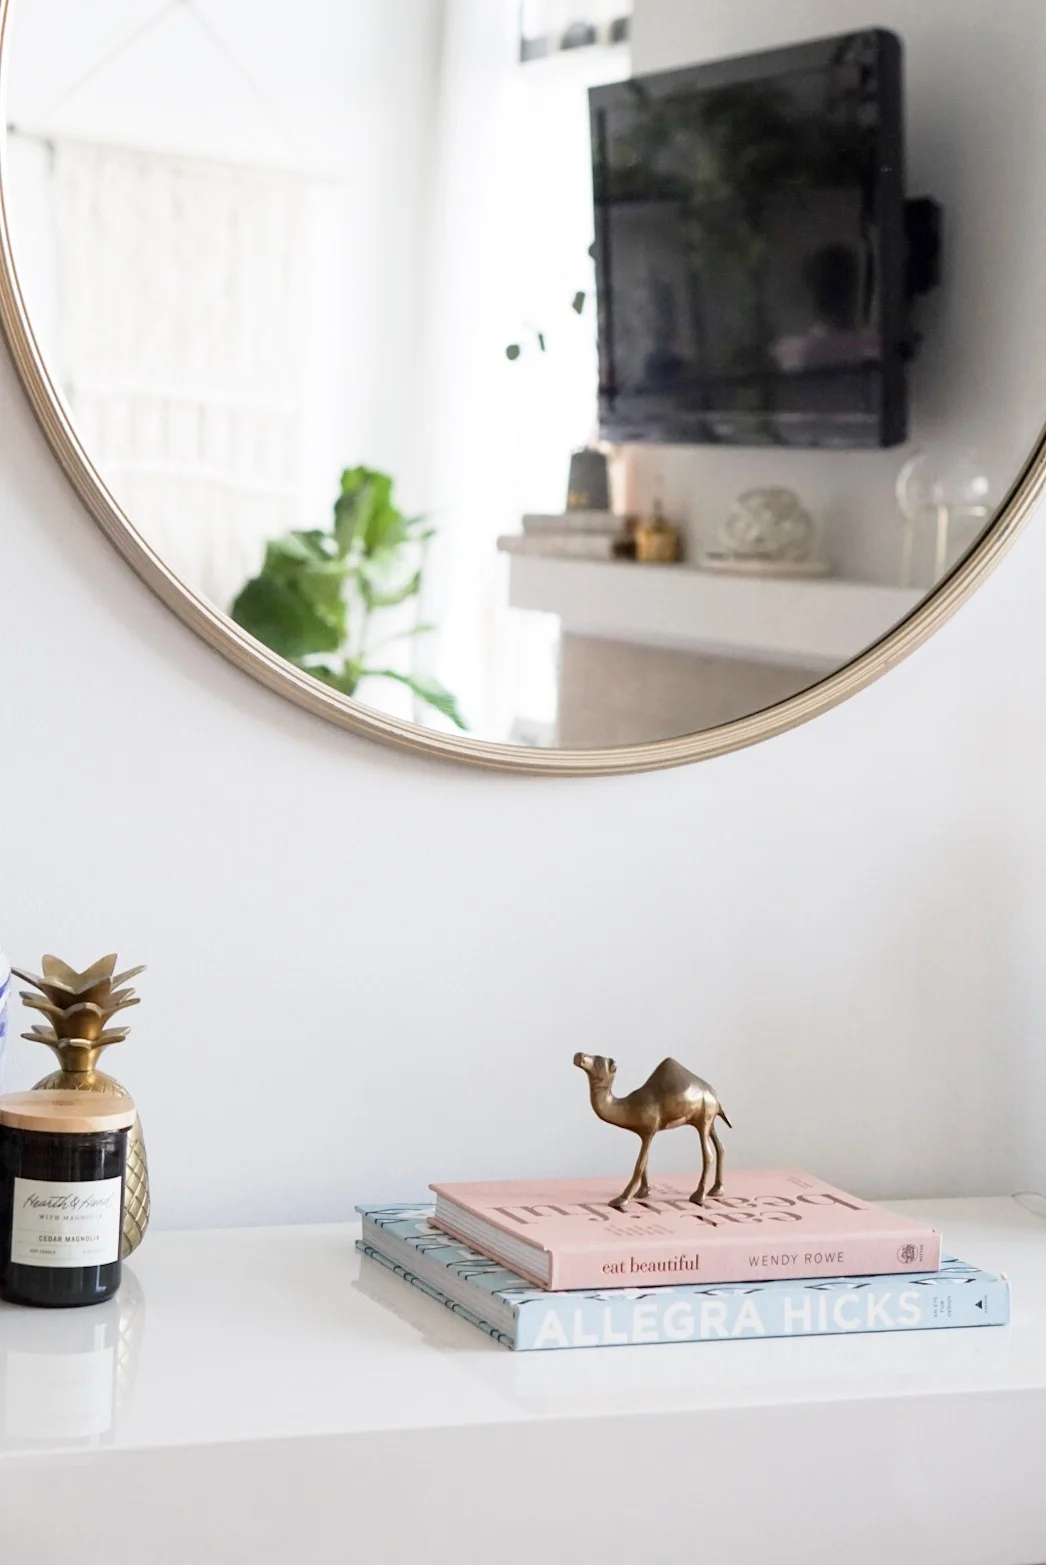
I knew I wanted a circular mirror, so I was thrilled to find one just a few weeks before moving into my new place. It's funny how things happen like that! Once the walls were painted, I replaced the awful light fixture with one I purchased while I was house hunting - probably one of my favourite things in my home. After those were in place, I accessorized around those pieces. I layered in some candles, my mom's vintage ginger vase, books, a vintage brass camel I found at a second hand shop, and of course, my diffuser.

IMG_2188.JPG
IMG_2659.JPG
IMG_2715.JPG

I change the decor on the table quite often, depending on the season or my mood, but that's the beauty of decor. Looking for console table must haves? I've linked similar options to mine below.

Shop the Look:

IMG_2724.PNG

Easter High Tea

Linnea A.

IMG_2600.JPG

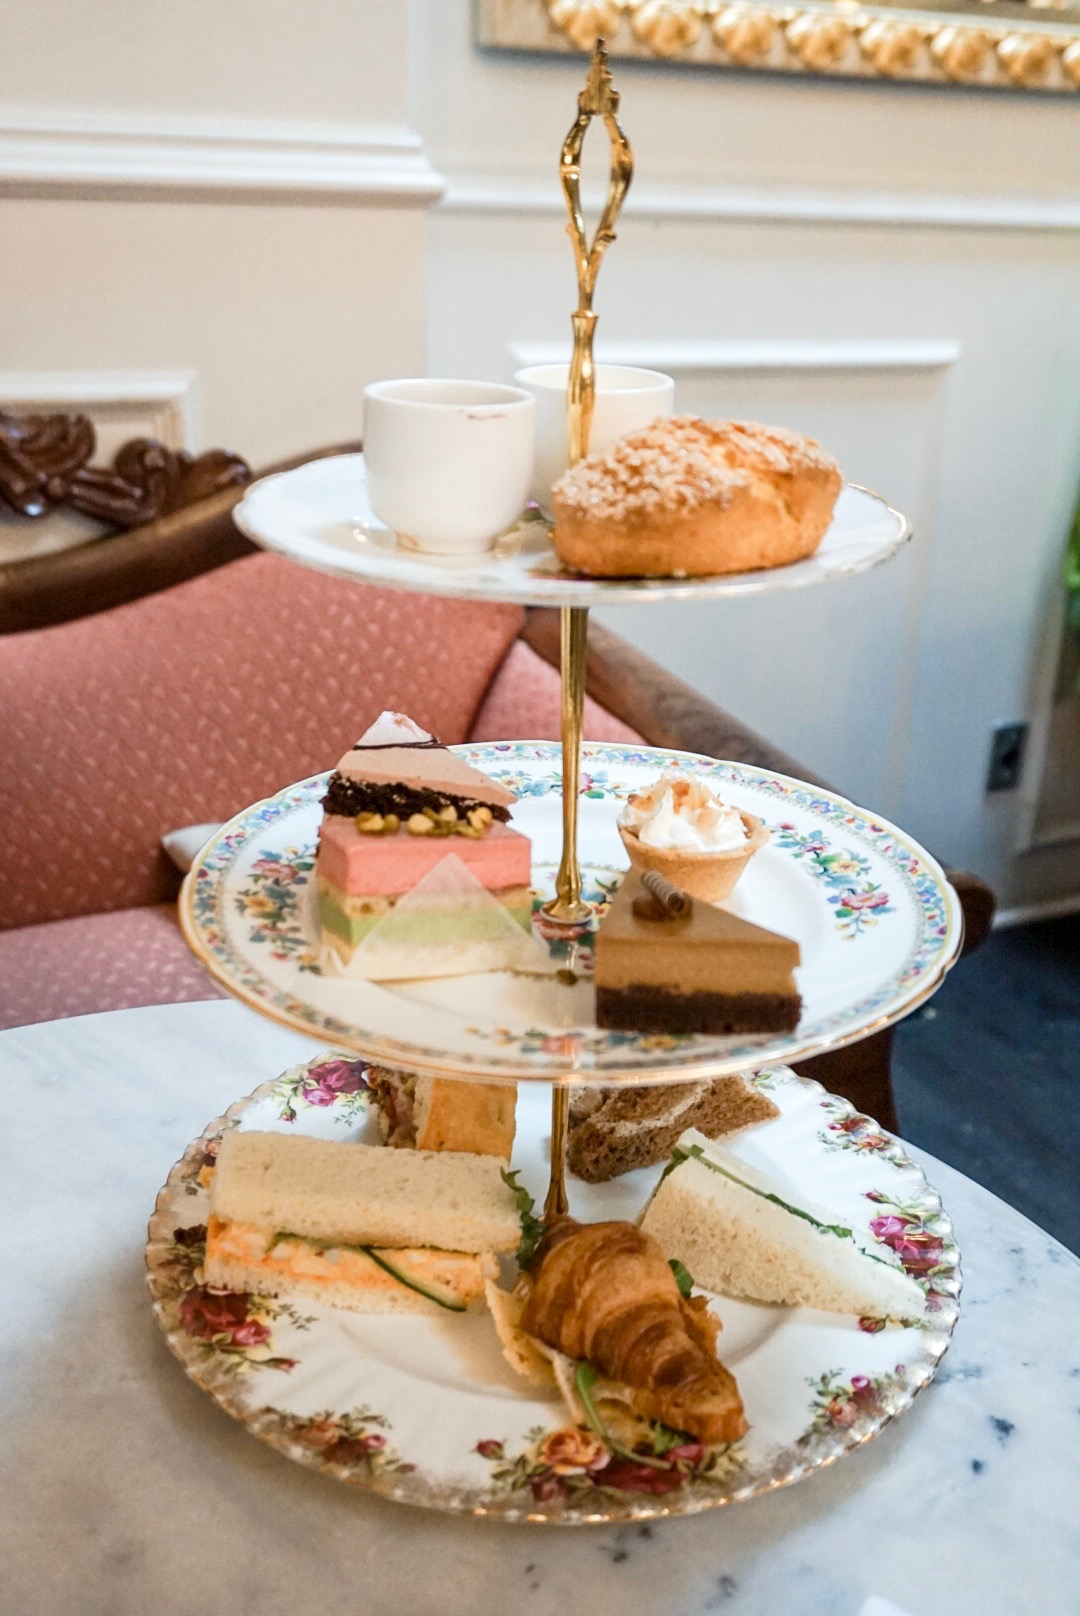
To kick off the Easter long weekend, I took a quick trip to Neverland. My colleague Tracy and I have made a tradition out of going to Neverland Tea Salon together every so often, and we follow our treats by heading to W. 4th to do some shopping. We always have a great time - it's amazing how much joy positive, sweet people can bring to your life!

27C46901-1250-4882-9855-0360A74D202C.JPG

I opted for the gluten and dairy omitted option, and according to Tracy, mine was overall better than hers. I was blown away by their gluten free bread - fluffiest I've ever had. And the scone! My God... GIMB. They also have vegetarian and vegan options - the only high tea place in Vancouver that offers those, so I highly recommend paying them a visit. 

My favourites out of the savouries were the citrus scone, the egg salad sandwich, and the pulled jackfruit sandwich. It literally tasted exactly like pulled pork - I am still in awe!

IMG_2611.JPG

As far as tea goes,  my favourite is always the Summer in Provence - it's a black tea with hints of lavender, and you know how I feel about lavender :) I also tried their London fog  with Almond milk, and it was equally as amazing. 

DEF2AD93-D9E2-4597-8B3D-9D53CF00F2D5.JPG

Definitely planning on coming back for Mother's Day, because my mom and Grandma would love it. I hope you all have a very Happy Easter my friends!

xo

Linnea

5 Tips to Help Organize Your Life

Linnea A.

IMG_2213.JPG

With aspirational social feeds and blog photos that make everything look perfect, life can look pretty on the outside, but the reality is, life is hard! And adulting is even harder... no one teaches you how to do it, but you're expected to figure it out as you go. On top of adulting, if you have multiple things on the go like I do, things can get a little tricky when your trying to balance it all.

I've thought about this a lot, and even though I'm a pretty busy person, I wouldn't have it any other way. I love my life, and all the frustrations and joys that come with it. But it's taken a while for me to develop a routine and a way of managing my time that works with the amount of commitments I have going on at once. Now I'll preface this post by saying I'm no expert, but if you're curious about how I prioritize the things that are important to me, I may have some insight into how you can manage it all (or appear to, anyway)!

IMG_2215.JPG

1. Lists, lists, lists

Even though I have computer screens and my phone in my face all day long, I still live heavily off of real, written lists. If something is on my mind, I write it down. At the beginning of the week, I write out every single one of my to do's for the week, including:

  • Work to do's
  • Upcoming blog posts/photos I need to take or edit
  • Freelance to do's
  • Personal chores and errands
  • Meals and grocery lists

Yes it's a lot, but it really helps to declutter my mind and preps me for the week ahead. Bullet journaling is also another list I try to incorporate daily; it's incredible how much writing something down will clear your head.

2. Use a calendar (and colour code it)

Ok, this may not be for everyone, but once something is confirmed or even tentatively scheduled, I put it in my Google calendar immediately, and sometimes I even invite my friends so they don't forget (lol s/o Megan!). I may be a little OCD with my colour coding, but my calendar is always jam packed like a pretty little rainbow, and I love it. I have a colour specific to everything, including fitness classes, blog posts, dinners/events, book club nights, bills, package arrivals, etc. Without my calendar, I'd likely forget it all!

IMG_2212.JPG

3. Schedule in "you" time, or things that bring you joy

Whether it's reading a book before bed, lighting a candle, doing my nails or taking Dash for a long walk, I always try to fit "me" time in whenever I can, and I block out that time on my calendar. It's so important, especially if you have a stressful life, and tend to say "yes" to almost everything like I do. Someone needs help planning an event? Yes, I can help. Someone needs social media guidance or help decorating? Yes, I'll help with that too. There's something about saying no to people that I have trouble with, but sometimes, it's necessary.

It's safe to say that I'm often burnt out by the end of the week, so Sundays are like a breath of fresh air. They've become a day of picking up the house, meal prepping, and unwinding - super duper necessary.

4. Make time for friends and/or family once a week

I see my family regularly throughout the week, so prioritizing their time isn't an issue for me. As far as my friends go, I've met them through all walks of life, so many of them don't really know/hang out with each other. Because of this, I make time for each of them, so I usually see at least one of them every week. They've become my ultimate stress relievers, because they give me the energy, motivation and confidence I need to keep going. Women supporting women is a powerful thing, and after a dinner or catch-up with my besties, I feel 100000x better than I did before, which is exactly how your friends should make you feel. I have the utmost respect for them, so prioritizing them is a must in my books. Flaky, negative people aren't worth your time!

IMG_2214.JPG

5. Take a deep breath

When people try to make plans with me the night or week of, I often laugh at the idea (sounds so mean, I know) but the reality is, I plan my days out at least a week in advance, and my calendar makes sure I don't miss a beat. But when everything is said and done, you have to take a deep breath, catch up with yourself, and prioritize conflicting events. There's something to be said about spontenaeity, and because I say yes to so many obligations, I've learned the importance of saying no, too. You can't maximize your full potential if you're too tired or stressed, so some nights, you just need some time to yourself, or time to do something completely out of the norm. There's no point in exercising or working on extra projects if you're too burnt out to begin with.

And with those tips, I'm able to somewhat get everything and more done in my schedule. Ironically, I used to think I was a lazy person outside of my work (and maybe I was), but if you called me lazy now, I'd have a few reasons to argue otherwise ;) Push yourself to your limit, and you'll accomplish more than you ever thought possible. I hope you're able to utilize these tips! And with that said, back to hustlin'.

xo

Linnea

Gluten Free Banana Waffles

Linnea A.

IMG_2073.JPG

In light of #InternationalWaffleDay today, I thought I'd share my favourite gluten free waffle recipe I've tried thus far! And bonus, they're vegan too! As long as you control your toppings, this recipe is a delicious healthy breakfast. 

IMG_2051.JPG
IMG_2050.JPG

For the waffles:

  • 1 banana, mashed

  • 1 cup rolled oats

  • 1/2 cup almond milk

  • 1 tsp cinnamon

  • 1 tbsp chia and hemp seeds (optional)

  • 1 cup spinach (optional, if you don't mind green pancakes)

Blend the ingredients together in a blender to form a batter. Heat your waffle iron, grease with coconut oil, and let each waffle cook until golden. If you don't have a waffle iron, you can make these into pancakes too, but I've found my mini iron to be  soo  handy!

For the toppings:

  • 1/2 banana, or fruit of your choice

  • 2 tsp maple syrup

  • 1 tsp cinnamon

  • 1 tbsp almond butter (optional - I just loooove almond butter)

Drizzle and dress your waffles, and there you have it, guilt-free waffles! Happy #InternationalWaffleDay, let me know what you think once you try the recipe! 

xo

Linnea


Before & After: My Entryway

Linnea A.

IMG_1353.JPG

Entryways are a little underrated, because they're pretty much like hostesses; they're the first thing you see when you walk into a space, and the last thing you see before you leave. Because of this, they're pretty important when it comes to first (and last) impressions.

Overall, my entryway is limited in terms of size, but I still wanted to create a functional space that set the tone for the rest of the apartment. I needed some hooks for Dash's leash, my purse, and the jacket or hat I happened to be wearing that day... so the search for entryway inspo began.

IMG_1856.JPG

Major renovations weren't needed quite yet, but I still wanted to give my entryway a little face lift. Here's the transformation from move-in day to now:

The Before

2rfe.jpg

As you can see in the before photo, the walls were builders' beige, bane of my existence! The very first thing I did (even before moving in) was paint the entire apartment white. I painted the whole place with my mom - just the two of us. I was originally thinking of hiring someone to paint my place because of the extremely high ceilings, but at the end of the day, it just wasn't worth it. Plus, we know a thing or two about handling a paint brush, and we love painting!

The Inspiration

Once I established the design style of my other spaces, I moved onto the entryway. I started searching for entryway inspiration, and when Alaina Kaczmarski gave me just the inspiration I needed, I got pretty darn close to what I was looking for. All I needed were some wall hooks, prints, a light fixture, and some frames. 

The After

To begin the transformation, the light fixture just had to go. The fixtures that came with my apartment were pretty hideous (as you can see above) so I went on the hunt for a something that paired well with my other fixtures, and suited the rest of the space.

IMG_1858.JPG
IMG_1855.JPG

Next up, the frames and prints. I wanted to keep it pretty simple because I already have a gallery wall in the living room, so I stuck to two prints of similar subjects.

When you're looking for prints and photos, my best advice is to look for free high-res images (aside from your own), on Unsplash. They have so many to choose from, and 9 times out of 10, everything will match if you make it gray scale!

IMG_1857.JPG

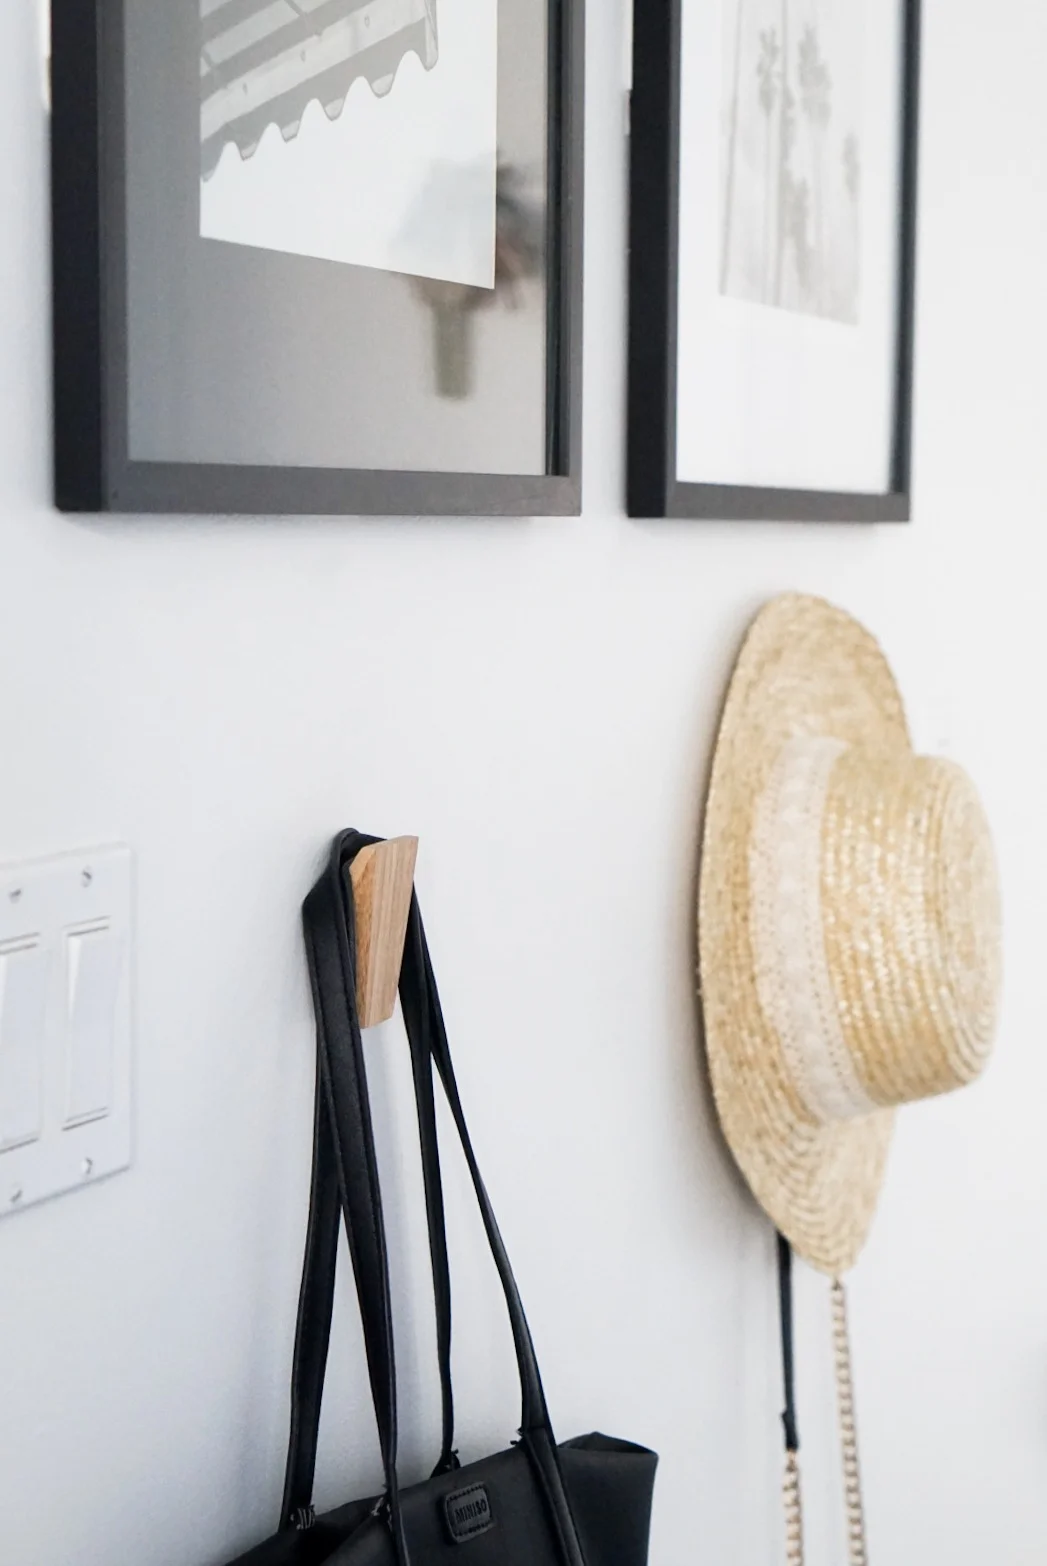
For the hooks, I decided to opt for wood because I needed to add some warmth to the space. Once those were up, I accessorized with an umbrella stand and a doormat, and the transformation was complete!

IMG_1853.PNG

Gold Pendant (splurge) | Gold Pendant (save) | Frame & PrintWooden Wall Hooks | Umbrella Stand | Doormat

The transformation just goes to show what can be done with a little bit of paint and wall art! I'm working on giving a few other spaces some love, but in the meantime, what else would you like to see? Let me know in the comments below.

xo

Linnea

Bullet Journaling

Linnea A.

IMG_1817.JPG

Bullet journaling has been a part of my daily routine for a few months now, and it's made such a huge difference in my well-being. Not only does it change your mindset with a positive intention to start your day, but it puts the small things into perspective, and it really makes you reflect on all the great things that happened during your day.

IMG_1818.JPG

Gratitude is so important, especially when you're not feeling your best, or unfortunate things are happening in your life that you can't control. I've had my fair share of ups and downs, and it's helped me tremendously. Just when you think that things can't get worse, sometimes they do, so by reflecting on the good things that happened throughout your day, they overshadow the bad, making you much happier and thankful for your day.

I've been using my Five Minute Journal for a few months now, and I love it not only because of the minimal design (or the fact that's it's Canadian, made by 2 of my favourite Youtubers - s/o Alex and Mimi!) but it's so easy to use. It's a dateless journal (meaning you can skip days and not feel bad about it), and you write in it morning and night. In the morning, it asks you to list 3 things you're grateful for, 3 things that would make your day great, and one positive affirmation about yourself. At night, you list 3 amazing things that happened during your day, and what you could have done to make your day a little better. This one pushes you to strive for improvement! The whole process literally takes 5 minutes out of your day to complete, and there's a different quote or challenge on every page, allowing you to reflect on that message throughout the day. 

IMG_1816.JPG

The journal has pushed me through some really hard times, especially with loss, but now I'm able to look back on the times that I was sincerely happy spending time with those loved ones. If I didn't document my happiness on those days, it would have been a lot harder for me to cope. 

So do yourself a favour... buy a Five Minute Journal! It will change your life for the better, I promise.

xo

Linnea

Coffee Table Books I've Been Loving

Linnea A.

IMG_1394.JPG

If you haven't already noticed, I have a slight obsession with coffee table books. Mostly those within the realm of home styling and entertaining, but I do love a good cook book as well! The purpose of my coffee tables books is threefold:

  1. To accessorize my home, scattering the books throughout my space
  2. For daily inspiration, whether that be through photos, content, styling or blog ideas
  3. To pick up and read a physical, hard cover book!
IMG_1397.JPG

I'm loving the collection I've curated thus far, so I thought I'd share a few of my favourites to get your collection started:

FullSizeRender.jpg

1. The Kinfolk Home 2. See San Francisco 3. Eat Beautiful 4. Eat Drink Nap 5. The Beauty Chef 6. The Kinfolk Table 7. All in Good Taste 8. Oh She Glows Every Day 9. Gypset Travel 

What's next on the list? Probably Magnolia Table... because #Gaines (Joanna Gaines, of course)!

xo

Linnea

Bar Cart Essentials

Linnea A.

IMG_1378.JPG

I've had my bar cart for 6 years now, and it's stuck with me ever since I moved out (as most of my pieces have). My friends used to call me the “bar cart queen” because I was obsessed with everything bar cart-related, and my cart was always styled differently every time they came over. When bar carts were "the thing" to have, you better believe I was all over it. It's safe to say it’s gone through a lot, but it's an extremely versatile piece…I've even used it as a TV console before!

IMG_1377.JPG

Now is no different, but my style has definitely evolved since then. I style the cart with sophisticated pieces, and use lots of black, gold, greenery and glass. I used to use my bar cart as a practical item, stocking it with every single bottle of alcohol I had in the house, but that doesn’t always prove to be the most aesthetically pleasing. So, to keep things simple, I only buy bottles of liquor that look good on the cart (and 9 times out of 10, they taste way better too), along with books, glasses and cocktail accessories.

IMG_0453.JPG
IMG_1399.JPG

Liquor (& Lavender)

I keep my bar cart pretty minimal now in terms of liquor... you’ll only find vodka, tequila, gin and wine. Oh, and don’t forget the lavender syrup (my obsession with lavender anything is off the charts, in case you didn't know). It’s mind-blowing, and makes everything taste better.

IMG_1400.JPG

Tray or Basket

Begin gathering your bar cart essentials by setting aside the bottles you wish to display, and finding a tray or coffee table book that they’ll sit nicely on. If you love wine, you likely have a wine rack, so choose a spot towards the bottom of the cart, and fill your rack with similar bottles (or multiples of your fave) for a cohesive look. I have a mirrored tray on the top of my bar (which I do switch out from time to time), that holds some bottles, glasses and silver shot glasses for a metallic pop.

Cocktail Accessories

Next, gather your cocktail accessories. These include coasters, a wine crank, bottle opener, strainer, etc. Maybe you have them styled in a cute shaker or organized in a set, but either way, make sure they’re handy for your next get together.

IMG_1395.JPG

Books & Candles

Lastly, add décor wherever you feel is lacking some love. Stack or lean some cocktail books, add a vase with some florals or greenery, and maybe even a candle or two. It also helps to have some non-alcoholic options for mix on hand, so stock up on those too! To make your life a little easier, here are some of my bar cart must-haves:

IMG_1079.PNG

1 | 2 | 3 | 4 | 5 | 6 | 7 | 8 | 9 

Happy styling! 

xo

Linnea

Patio Moodboard

Linnea A.

AB801BA6-1387-4C0A-B5AC-4439630BC19C.jpg

Call it the luck of the draw, but for some reason, I keep lucking out with patio space, which is quite rare where I live. I didn't get to spend much time on my patio last summer, so this year, I plan on spending plenty of time out there.

Before patio season begins, I wanted to create a moodboard for my patio vision. That way, I can walk through the process of bringing my moodboard to life in a future post. I'm also a firm believer that if you put things out into the universe, they'll happen... so let's give this a shot.

I already have my key outdoor pieces, including my sectionals, rug, storage chest, etc., but there are still a few things I'd like to add to make the most out of the space. Let's get to it - here's my 2018 patio moodboard:

IMG_0925.PNG

Mudcloth Throw Pillows | Cement Planters | Sectional | CactusCement Coffee Table | Plant StandsOutdoor CandlePapasan Chair | Throw Blanket | Straw Pouf | Ceramic Stool

Here's to hoping my patio dreams come true! Until next time...

xo

Linnea

Berry Protein Smoothie Bowl

Linnea A.

IMG_9651.JPG

If you know me, you know how much I love smoothie bowls, and smoothies in general. It's my go to breakfast M-F, and on weekends, I always treat myself to at least one smoothie bowl, whether that be an acai bowl, or some sort of protein bowl. There are soo many good smoothie recipes out there, but I love trying different variations on my own. Here's my latest creation:

IMG_9653.JPG
IMG_9652.JPG

For the base

For the toppings

  • Fruit of your choice (I chose banana chips because I didn't have any fresh fruits)

  • 1 tbsp chia and hemp seeds

  • 1/2 cup gluten-free granola

Put all the ingredients into a blender. Blend, pour, sprinkle, and enjoy.

xo

Linnea


Shelfie Styling 101

Linnea A.

IMG_9683.JPG

Bookshelves have been popular for a while now... and I know because I've had my trusty Ikea Vittsjö shelf ever since I moved out (almost 6 years ago, omg) and I've loved it ever since. It's been with me in every single home I've lived in, so it's grown with me throughout the years, and I've changed what it displays many, many times. Styling a shelfie  can be a little tricky, but my hope is to break it down to be a little easier for you.

IMG_9656.JPG

Clean every surface

To begin, take everything off of every shelf, and clean every surface. You can't have a sharp looking bookshelf if it's dusty!

IMG_9684.JPG

Style your books

Next, visualize where you'd like to store your books. I like to scatter my books diagonally, so that there aren't too many of the same vignettes happening next to each other. Books can be stacked either on top of one another, or with the spines displayed vertically. It really depends on the size and composition of the book! For paperback books with less-than-lovely covers, try flipping them the other way, so you have a uniform display of the neutral-toned pages. 

IMG_9654.JPG

Shop your home

Once you're happy with the way your books look, it's time to shop your home. This is where you get out your vases, tealight holders, heirlooms, plants, frames, purses, perfumes, and whatever else you have lying around without a home. Use your books as your base, and scatter the other knick-knacks around them. Trial and error is key here!

Plants, plants, plants

Greenthumb or not, plants really do make the room come together, so make sure you have lots of them! They're super affordable, and they pair well with almost everything. 

IMG_9676.JPG

Find additional storage

One of my favourite pieces on my bookshelf is my mom's antique ginger jar. She brought two of them all the way from the Philippines when she moved to Canada, so they're sentimental pieces that I'll always have in my home (or as long as she lets me keep them lol). And bonus! They act as a great storage space for extra chargers and things I don't want lying around in plain sight.

IMG_9687.JPG

Balance is key

Make sure you balance the weight of your items, and play with varying heights. Don't be afraid to lean frames against the wall, or have plants growing off the shelves. Once you're happy with how your shelves look, take a step back, and embrace your creation! The shelf should be full of items that bring you joy, and in turn, seeing it everyday will make you happy. 

SHOP THE LOOK

 Jo Malone Cologne | Viktor & Rolf Flowerbomb | Gold plant standThe Coveteur | Three Times a Day | All in Good Taste | SHE by Kate Spade

And that's it, styling complete!

xo

Linnea

Current Skincare Favourites

Linnea A.

IMG_9493.JPG

It's no secret that I'm getting older...I mean, who isn't? And with that in mind, 2018 is the year that I'm putting myself first in all aspects of my life. Sounds a little selfish, but if i'm gonna do it, now's the time. In doing so, I'm making my health, nutrition, and beauty from within more of a priority. Skincare goes hand in hand with that, and I have quite a few favourites to share.

IMG_9490.JPG

First off, let's just say one word. Serums. Oh my goodness, these bad boys are changing the game. I used to use some higher-end drugstore serums that made my skin feel nice and made my makeup application super duper smooth, but I never looked at the ingredients... I was all about the price. Since then, I've experimented a bit with different serums for various issues/benefits, and let me tell you, I am obsessed. They are one of the best inventions ever. Especially when you apply them with your refrigerated jade roller...game changer.

Without further ado, here's a roundup of my absolute faves:

Sunday Riley Luna Sleeping Night Oil: This is a little of a splurge, but this retinoid is everything. Not only is the bottle amazing to look at, but the potion inside is magic, and I love the smell, too! The chamomile essential oil in this seriously makes me sleep like a baby.

Glossier Super Pack: Glossier's a brand that's doing big things in the skincare industry, and their packaging gets me every time. For tired, dull skin, use Super Glow. For breakouts, use Super Pure, and for dehydration (aka hangovers), use Super Bounce. These small but powerful serums really do work, and I love them, but I've found that they're almost identical to The Ordinary's products, so if you're on a budget, buy those instead!

The Ordinary, everyfreakin'thing: I use A LOT of products from the Ordinary, and I love everything about them. They're Canadian, have perfect minimal packaging, AND they're all silicone-free, alcohol-free and cruelty-free. But my favourites are the Hyaluronic Acid + B5 for instant hydration, as well as Niaciminide + Zinc for blemishes and redness (these are equivalent to the Super Bounce and Super Pure, above). I also love using The Buffet as a daily "anti-aging" multivitamin for my skin, as well as the Granactive Retinoid 5% in squalene, which is similar to the Sunday Riley Sleeping Oil (without the nice smell and at a much cheaper price).

Jade Roller: Besides the fact that serums are amazing on their own, I've grown to love applying them with my jade roller. It's a super affordable tool that you can put in the fridge for the next time you feel puffy. The feeling you get when you apply your serum with the cooled jade is incredible! Seriously, try it.

Thayers Witch Hazel Lavender Toner: I've been using this toner for a while now, and it's great for calming and purifying the skin before serum application. Plus, it's lavender, so bonussss! 

What are your go to skincare items? I'd love to know if you have any favourite invisible SPF's! 

xo                                                                                                                                                  Linnea